Description
Ingredients
For this venison bacon recipe, you’ll need:
For the meat:
- 5 pounds of venison roast (shoulder or hindquarter works best)
- 2 pounds of pork fat (ask your local butcher for fatback or pork belly fat)
For the cure:
- 3 tablespoons kosher salt (not table salt)
- 2 tablespoons brown sugar
- 2 teaspoons pink curing salt #1 (Prague powder)
- 2 tablespoons black pepper, coarsely ground
- 1 tablespoon maple syrup
- 2 teaspoons garlic powder
- 1 teaspoon onion powder
- 1 teaspoon smoked paprika
- ½ teaspoon ground coriander
- ¼ teaspoon ground nutmeg
Instructions
Start by partially freezing your venison roast and pork fat for about 1-2 hours until firm but not completely frozen. This makes it much easier to slice and grind.
Cut the venison and pork fat into 1-inch chunks. You’ll want to aim for a ratio of about 70% venison to 30% pork fat. This fat content is crucial—it’s what gives your venison bacon that authentic bacon texture and prevents it from becoming too dry.
Eric laughs at how meticulous I get during this step, but trust me, taking your time here makes all the difference in the final product. The first time I made this, I rushed and had uneven fat distribution—rookie mistake!
Using a meat grinder with a medium plate (about 3/8-inch holes), grind the venison and pork fat together, alternating between the two to ensure even distribution.
Place the ground mixture into a large bowl and add all your cure ingredients. With clean hands (I keep disposable gloves in the kitchen for just this purpose), mix thoroughly until the spices are evenly distributed and the meat mixture becomes slightly sticky.
At this point, I always take a small spoonful of the mixture, cook it in a small frying pan, and taste for seasoning. This is your only chance to adjust the flavor before curing, so don’t skip this step!
Line a 9×13 inch baking dish with plastic wrap, allowing excess to hang over the sides. Press the meat mixture firmly into the dish, creating an even layer. The thickness is up to you—I prefer about 1.5 inches for the perfect bacon slice.
Fold the excess plastic wrap over the top, then place a second baking dish on top. Add a few heavy canned goods to weigh it down. This pressure helps the meat bind together during curing.
Place the weighted meat in the refrigerator and let it cure for 5-7 days. The curing process is essential for developing those bacon flavors and ensuring food safety. Turn the meat slab over once daily during curing.
After curing, remove the meat from the refrigerator and unwrap. Rinse the slab under cold water and pat dry with paper towels. The rinsing removes excess salt that could make your bacon too salty.
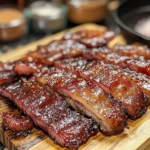
At this point, you can slice a small piece and fry it up to test the flavor. The bacon will be a deep reddish-brown color and firm to the touch.
If smoking, let the slab sit uncovered in the refrigerator for 4-6 hours or overnight to develop a pellicle (a tacky surface that helps smoke adhere).
You have two excellent options for finishing your venison bacon:
Smoking method: Preheat your smoker to 200°F. Use apple, cherry, or hickory wood for the best flavor. Smoke the bacon until it reaches an internal temperature of 150°F (about 3-4 hours). Let it cool completely before slicing.
Oven method: Preheat your oven to 200°F. Place the bacon on a rack over a baking sheet to catch drippings. Bake until it reaches an internal temperature of 150°F (about 2-3 hours). For added smoky flavor, add a few drops of liquid smoke to the meat mixture during Step 2.
Once cooled, slice your bacon to your preferred thickness. I recommend using a meat slicer for consistent results, but a sharp knife works well too. Package in airtight containers or vacuum-sealed bags and refrigerate for up to 2 weeks or freeze for up to 6 months.
- Prep Time: 60 minutes
- Cook Time: 240 minutes
- Category: Breakfast
- Method: Baking
- Cuisine: American
Nutrition
- Serving Size: 2 ounces
- Calories: 180 per serving
Keywords: venison bacon, game meat, homemade bacon, deer meat recipes, hunting recipes