Description
Ingredients
For this homemade wine recipe, you’ll need:
Primary Ingredients:
-
- 4 lbs fresh fruit (berries, grapes, or stone fruits work wonderfully)
-
- 3–4 lbs granulated sugar (adjust based on desired sweetness)
-
- 1 gallon filtered water
-
- 1 packet wine yeast (available online or at homebrew shops)
-
- 1 tsp acid blend (citric acid works as a substitute)
-
- 1 tsp pectic enzyme
-
- 1 tsp yeast nutrient
-
- 1 Campden tablet (crushed)
Equipment:
-
- 1-gallon glass carboy or food-grade plastic fermentation bucket
-
- Airlock and bung
-
- Large stockpot
-
- Straining bag
-
- Funnel
-
- Siphon tube
-
- Bottles for storage
-
- Sanitizing solution
Instructions
Step 1: Sanitize Everything
First things first—sanitize all equipment that will come in contact with your wine. This is absolutely critical for recipes for homemade wine! Even the tiniest contaminant can ruin your entire batch.
- Mix your sanitizing solution according to package directions
- Thoroughly clean all equipment
- Allow equipment to air dry on clean towels
Tip from my kitchen: I learned the hard way that skipping proper sanitization leads to spoiled wine. Trust me, those extra few minutes are worth it!
Step 2: Prepare Your Fruit
Your fruit is the star of this homemade wine recipe, so choose ripe, high-quality produce.
- Wash fruit thoroughly
- Remove any stems, leaves, or pits
- For berries and soft fruits: lightly crush to release juices
- For harder fruits: chop into smaller pieces
- Place fruit in a sanitized straining bag and tie securely
My family touch: We make this a family activity! Lila and Caleb love helping wash the berries (though Caleb sneaks quite a few during the process).
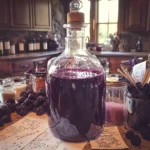
Step 3: Create Your Must
“Must” is winemaking lingo for the mixture that will ferment into wine.
- Fill a large stockpot with water and heat it until it reaches a gentle simmer.
- Dissolve sugar in the water, stirring until completely clear
- Remove from heat and cool to room temperature
- Place the bag of fruit in your fermentation container
- Pour the sugar-water mixture over the fruit
- Add acid blend, pectic enzyme, and yeast nutrient
- Crush one Campden tablet and add to the mixture
- Stir gently but thoroughly
Kitchen wisdom: This mixture should smell fresh and fruity. If it smells off in any way, something may have contaminated your must.
Step 4: Begin Primary Fermentation
This is where the magic starts to happen!
- Cover the fermentation container with a cloth and secure with a rubber band
- Let sit for 24 hours to allow the Campden tablet to dissipate
- Sprinkle wine yeast over the must
- Replace cloth with airlock and bung (if using a carboy)
- Store in a warm (65-75°F) location away from direct sunlight
- Once daily, gently press the fruit bag to release juices
- Watch for bubbling in the airlock—this means fermentation has begun!
Personal note: I keep my fermenting wine in our pantry—it’s dark and maintains a perfect temperature. Plus, watching those first bubbles appear feels like witnessing a small miracle!
Step 5: Secondary Fermentation
After 5-7 days, it’s time to move to secondary fermentation, which develops more complex flavors.
- Remove the fruit bag, gently squeezing out remaining juice
- Using a sanitized siphon tube, transfer the liquid to a clean carboy
- Attach airlock and bung
- Move to a cooler location (60-65°F) if possible
- Let it continue fermenting for 1-3 months
Pro tip: Mark your calendar for “wine check days” once a month. This helps you keep track of progress and prevents the “out of sight, out of mind” problem I’ve experienced!
Step 6: Clarify and Stabilize
Patience pays off in this step of your homemade wine recipe.
- When fermentation has stopped (no more bubbles in airlock), rack the wine again
- Add another crushed Campden tablet to stabilize
- Let sit for at least 1 more month
- If still cloudy, rack again and let sit longer
Confession time: I sometimes get impatient during this step, but every extra week of waiting truly improves your wine!
Step 7: Bottle Your Wine
The exciting finale to your winemaking journey!
- Sanitize bottles, corks, and bottling equipment
- Using your siphon, transfer wine to bottles
- Leave about 1 inch of space at the top
- Insert corks and store bottles on their sides
- Label with the type of wine and date
- Age for at least 3 months before tasting
- Prep Time: 60 minutes
- Cook Time: 0 minutes
- Category: Beverage
- Method: Fermentation
- Cuisine: American
Nutrition
- Serving Size: 5 oz
- Calories: 120
Keywords: homemade wine recipe, fruit wine making, berry wine fermentation, beginner winemaking guide, DIY wine recipe