Table of Contents
There’s something deeply satisfying about sipping a glass of wine you’ve crafted with your own hands. I still remember the first batch of homemade wine I created in our little yellow farmhouse here in Asheville. Eric and I had harvested a bumper crop of blackberries that summer, and rather than let them go to waste, we decided to try our hand at a homemade wine recipe. I was surprised by how simple the process was—and the results? Even better than I imagined. Well, let’s just say our friends now request “Olivia’s Vintage” at every gathering!
Making your own wine might sound like something reserved for vineyard owners or professional vintners, but I’m here to tell you that with some basic ingredients, patience, and a bit of kitchen magic, you can create a delightful homemade wine that rivals store-bought varieties.
Why You’ll Love This Recipe
There’s something deeply personal about crafting your own homemade wine. Beyond the satisfaction of creating something from scratch (which we home cooks live for!), there are so many reasons to fall in love with this process:
- Customizable: Unlike commercial wines, you control every aspect of the flavor profile
- Budget-friendly: A fraction of the cost of quality store-bought wine
- Conversation starter: Nothing impresses guests more than serving your own vintage
- Rewarding: The wait makes that first sip so much more satisfying
- No special equipment: Basic kitchen tools are all you need to get started
Plus, there’s a certain magic in transforming simple fruits into something so complex and delightful. It connects us to generations of home winemakers who came before us.
Ingredients
For this homemade wine recipe, you’ll need:
Primary Ingredients:
- 4 lbs fresh fruit (berries, grapes, or stone fruits work wonderfully)
- 3-4 lbs granulated sugar (adjust based on desired sweetness)
- 1 gallon filtered water
- 1 packet wine yeast (available online or at homebrew shops)
- 1 tsp acid blend (citric acid works as a substitute)
- 1 tsp pectic enzyme
- 1 tsp yeast nutrient
- 1 Campden tablet (crushed)
Equipment:
- 1-gallon glass carboy or food-grade plastic fermentation bucket
- Airlock and bung
- Large stockpot
- Straining bag
- Funnel
- Siphon tube
- Bottles for storage
- Sanitizing solution
Substitution Tips:
- No wine yeast? In a pinch, champagne yeast works well for most fruits
- Fresh out of pectic enzyme? Your wine might be cloudier, but it’s not essential
- No Campden tablets? You can skip them, but be extra careful about sanitization
Timing
- Prep Time: 1 hour
- Primary Fermentation: 7-10 days
- Secondary Fermentation: 1-3 months
- Aging: 3-12 months (the longer, the better!)
- Total Time: 4-16 months
I know the timing might seem intimidating, but most of this is hands-off waiting time. The active work happens in brief, enjoyable bursts spread over months. Think of it as a wonderful slow-living project!
Step-by-Step Instructions
Step 1: Sanitize Everything
First things first—sanitize all equipment that will come in contact with your wine. This is absolutely critical for recipes for homemade wine! Even the tiniest contaminant can ruin your entire batch.
- Mix your sanitizing solution according to package directions
- Thoroughly clean all equipment
- Allow equipment to air dry on clean towels
Tip from my kitchen: I learned the hard way that skipping proper sanitization leads to spoiled wine. Trust me, those extra few minutes are worth it!
Step 2: Prepare Your Fruit
Your fruit is the star of this homemade wine recipe, so choose ripe, high-quality produce.
- Wash fruit thoroughly
- Remove any stems, leaves, or pits
- For berries and soft fruits: lightly crush to release juices
- For harder fruits: chop into smaller pieces
- Place fruit in a sanitized straining bag and tie securely
My family touch: We make this a family activity! Lila and Caleb love helping wash the berries (though Caleb sneaks quite a few during the process).
Step 3: Create Your Must
“Must” is winemaking lingo for the mixture that will ferment into wine.
- Fill a large stockpot with water and heat it until it reaches a gentle simmer.
- Dissolve sugar in the water, stirring until completely clear
- Remove from heat and cool to room temperature
- Place the bag of fruit in your fermentation container
- Pour the sugar-water mixture over the fruit
- Add acid blend, pectic enzyme, and yeast nutrient
- Crush one Campden tablet and add to the mixture
- Stir gently but thoroughly
Kitchen wisdom: This mixture should smell fresh and fruity. If it smells off in any way, something may have contaminated your must.
Step 4: Begin Primary Fermentation
This is where the magic starts to happen!
- Cover the fermentation container with a cloth and secure with a rubber band
- Let sit for 24 hours to allow the Campden tablet to dissipate
- Sprinkle wine yeast over the must
- Replace cloth with airlock and bung (if using a carboy)
- Store in a warm (65-75°F) location away from direct sunlight
- Once daily, gently press the fruit bag to release juices
- Watch for bubbling in the airlock—this means fermentation has begun!
Personal note: I keep my fermenting wine in our pantry—it’s dark and maintains a perfect temperature. Plus, watching those first bubbles appear feels like witnessing a small miracle!
Step 5: Secondary Fermentation
After 5-7 days, it’s time to move to secondary fermentation, which develops more complex flavors.
- Remove the fruit bag, gently squeezing out remaining juice
- Using a sanitized siphon tube, transfer the liquid to a clean carboy
- Attach airlock and bung
- Move to a cooler location (60-65°F) if possible
- Let it continue fermenting for 1-3 months
Pro tip: Mark your calendar for “wine check days” once a month. This helps you keep track of progress and prevents the “out of sight, out of mind” problem I’ve experienced!
Step 6: Clarify and Stabilize
Patience pays off in this step of your homemade wine recipe.
- When fermentation has stopped (no more bubbles in airlock), rack the wine again
- Add another crushed Campden tablet to stabilize
- Let sit for at least 1 more month
- If still cloudy, rack again and let sit longer
Confession time: I sometimes get impatient during this step, but every extra week of waiting truly improves your wine!
Step 7: Bottle Your Wine
The exciting finale to your winemaking journey!
- Sanitize bottles, corks, and bottling equipment
- Using your siphon, transfer wine to bottles
- Leave about 1 inch of space at the top
- Insert corks and store bottles on their sides
- Label with the type of wine and date
- Age for at least 3 months before tasting
Special touch: I create custom labels with the vintage year and a name inspired by whatever was happening in our lives when we made the wine. Our “New Puppy Pinot” still makes us laugh!
Cooking Tips
After making numerous batches of homemade wine, I’ve gathered some practical insights:
- Temperature matters: Too warm and fermentation happens too fast; too cold and it might not start at all
- Taste as you go: Sample during racking to understand how flavors develop
- Keep notes: Document everything for your future batches
- Start simple: Begin with forgiving fruits like berries before tackling more challenging varieties
- Quality ingredients: Better fruit yields better wine—period!
- Be patient: The biggest mistake new winemakers make is rushing the process
For an extra special touch, try adding spices like cinnamon or vanilla during the secondary fermentation to create unique flavor notes.
Personal Story
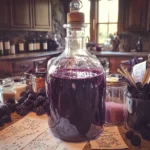
The first time I successfully completed a homemade wine recipe was for our fifth wedding anniversary. Eric and I had been touring small vineyards in North Carolina, and I was inspired to try creating our own special vintage. We picked blackberries from our property, and I followed a recipe much like this one.
Six months later, we opened that first bottle on a crisp fall evening by our firepit. The deep purple liquid sparkled in our glasses, and that first sip—slightly sweet, with a perfect balance of tart and fruity notes—was pure magic. Eric’s face lit up in surprise, and honestly, I was shocked too at how professional it tasted!
That moment cemented winemaking as an annual tradition in our home, one that marks the seasons and special occasions in a way that store-bought wine never could.
Nutritional Information
Homemade wine, when enjoyed in moderation, offers some surprising health benefits:
- Antioxidants: Especially high in fruit wines
- Resveratrol: Found particularly in grape-based wines
- Lower sulfites: Compared to commercial wines
- Alcohol content: Typically 10-14% by volume
Remember that homemade wine contains alcohol and should be enjoyed responsibly by adults of legal drinking age. A standard serving is 5 ounces, which contains approximately 120-150 calories depending on sweetness levels.
Healthier Alternatives
If you’re looking for variations on this homemade wine recipe, consider these modifications:
- Lower sugar: For a drier wine, reduce sugar by up to 1 pound
- Honey substitute: Replace sugar with honey for a more complex mead-wine hybrid
- Lower alcohol: Dilute with a bit more water before fermentation
- Non-alcoholic version: Create a similar fruit syrup by simmering fruit with sugar and water, then mixing with sparkling water
I’ve found that herbal infusions like lemon balm can add interesting dimensions to lighter fruit wines without adding calories.
Serving Suggestions
Your homemade wine deserves to be showcased beautifully:
- Temperature: Most fruit wines taste best slightly chilled, but not ice-cold
- Glassware: Tulip-shaped wine glasses help concentrate aromas
- Food pairings: Berry wines complement desserts like cheesecake, while apple or pear wines pair wonderfully with cheese
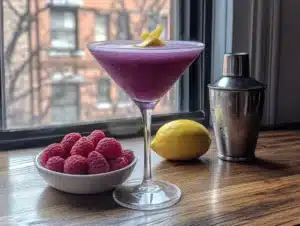
- Garnishes: A small slice of the original fruit adds a beautiful touch
- Occasion: Homemade wine makes holiday gatherings and celebrations extra special
I love serving my blackberry wine alongside a cheese board with sharp cheddar, walnuts, and honey—the combination is absolutely divine!
Common Mistakes to Avoid
Even experienced home winemakers encounter challenges. Here are pitfalls to watch for:
- Poor sanitization: The #1 cause of spoiled wine
- Exposed fermentation: Keep air contact minimal after primary fermentation
- Rushing the process: Each stage needs its full time
- Improper storage: Store bottles on their sides in a cool, dark place
- Too much fruit: More isn’t always better—follow quantity guidelines
- Inconsistent temperature: Sudden changes can stall fermentation
Remember, winemaking is part science, part art. Even “mistakes” sometimes create unexpected delights!
Storing & Reheating Tips
Your precious homemade wine deserves proper storage:
- Storage position: Keep bottles on their sides to keep corks moist
- Temperature: Aim for 55-65°F, with minimal fluctuations
- Light exposure: Protect from light by storing in a cool, dark place to avoid UV-related spoilage.
- Aging potential: Most homemade fruit wines peak between 1-3 years
- After opening: Recork and refrigerate; consume within 3-5 days
FAQs
Can I use frozen fruit for homemade wine recipes?
Absolutely! Frozen fruit actually works wonderfully because the freezing process breaks down cell walls, releasing more juice and flavor. Just thaw completely before using.
How do I know when my homemade wine is ready to drink?
The wine should be clear (not cloudy), with no visible bubbles or fermentation activity. The flavor will be smooth rather than harsh or yeasty. Most homemade wines need at least 6 months of aging from start to finish.
Can I make homemade wine without adding sugar?
While sugar is essential for fermentation, you can experiment with reducing amounts. Very sweet fruits may require less added sugar, but eliminating it completely would result in a very low-alcohol product with limited shelf stability.
Final Thoughts
Creating your own homemade wine connects you to an ancient tradition that spans cultures and generations. There’s something profoundly satisfying about transforming simple fruits into complex, delicious wine through time, patience, and a touch of science.
I hope this homemade wine recipe inspires you to embark on your own winemaking journey. Remember that each batch is a learning experience, and even professional vintners are constantly refining their craft. The beauty of homemade wine isn’t in its perfection, but in the story it tells and the joy it brings when shared with those you love.
If you try this recipe, I’d love to hear about your winemaking adventures! Drop me a comment below or tag me in your social media posts. And if you’re looking for something delicious to serve alongside your homemade wine, check out my easy chocolate caramel fondue recipe for a truly special pairing.
Until next time, happy winemaking from my kitchen to yours!
Homemade Wine Recipe: 7 Steps to Craft Your Perfect Vintage
Total Time: 1 hour
Yield: 1 gallon 1x
Diet: Vegan
Description
Ingredients
Scale
For this homemade wine recipe, you’ll need:
Primary Ingredients:
-
- 4 lbs fresh fruit (berries, grapes, or stone fruits work wonderfully)
-
- 3–4 lbs granulated sugar (adjust based on desired sweetness)
-
- 1 gallon filtered water
-
- 1 packet wine yeast (available online or at homebrew shops)
-
- 1 tsp acid blend (citric acid works as a substitute)
-
- 1 tsp pectic enzyme
-
- 1 tsp yeast nutrient
-
- 1 Campden tablet (crushed)
Equipment:
-
- 1-gallon glass carboy or food-grade plastic fermentation bucket
-
- Airlock and bung
-
- Large stockpot
-
- Straining bag
-
- Funnel
-
- Siphon tube
-
- Bottles for storage
-
- Sanitizing solution
Instructions
Step 1: Sanitize Everything
First things first—sanitize all equipment that will come in contact with your wine. This is absolutely critical for recipes for homemade wine! Even the tiniest contaminant can ruin your entire batch.
- Mix your sanitizing solution according to package directions
- Thoroughly clean all equipment
- Allow equipment to air dry on clean towels
Tip from my kitchen: I learned the hard way that skipping proper sanitization leads to spoiled wine. Trust me, those extra few minutes are worth it!
Step 2: Prepare Your Fruit
Your fruit is the star of this homemade wine recipe, so choose ripe, high-quality produce.
- Wash fruit thoroughly
- Remove any stems, leaves, or pits
- For berries and soft fruits: lightly crush to release juices
- For harder fruits: chop into smaller pieces
- Place fruit in a sanitized straining bag and tie securely
My family touch: We make this a family activity! Lila and Caleb love helping wash the berries (though Caleb sneaks quite a few during the process).
Step 3: Create Your Must
“Must” is winemaking lingo for the mixture that will ferment into wine.
- Fill a large stockpot with water and heat it until it reaches a gentle simmer.
- Dissolve sugar in the water, stirring until completely clear
- Remove from heat and cool to room temperature
- Place the bag of fruit in your fermentation container
- Pour the sugar-water mixture over the fruit
- Add acid blend, pectic enzyme, and yeast nutrient
- Crush one Campden tablet and add to the mixture
- Stir gently but thoroughly
Kitchen wisdom: This mixture should smell fresh and fruity. If it smells off in any way, something may have contaminated your must.
Step 4: Begin Primary Fermentation
This is where the magic starts to happen!
- Cover the fermentation container with a cloth and secure with a rubber band
- Let sit for 24 hours to allow the Campden tablet to dissipate
- Sprinkle wine yeast over the must
- Replace cloth with airlock and bung (if using a carboy)
- Store in a warm (65-75°F) location away from direct sunlight
- Once daily, gently press the fruit bag to release juices
- Watch for bubbling in the airlock—this means fermentation has begun!
Personal note: I keep my fermenting wine in our pantry—it’s dark and maintains a perfect temperature. Plus, watching those first bubbles appear feels like witnessing a small miracle!
Step 5: Secondary Fermentation
After 5-7 days, it’s time to move to secondary fermentation, which develops more complex flavors.
- Remove the fruit bag, gently squeezing out remaining juice
- Using a sanitized siphon tube, transfer the liquid to a clean carboy
- Attach airlock and bung
- Move to a cooler location (60-65°F) if possible
- Let it continue fermenting for 1-3 months
Pro tip: Mark your calendar for “wine check days” once a month. This helps you keep track of progress and prevents the “out of sight, out of mind” problem I’ve experienced!
Step 6: Clarify and Stabilize
Patience pays off in this step of your homemade wine recipe.
- When fermentation has stopped (no more bubbles in airlock), rack the wine again
- Add another crushed Campden tablet to stabilize
- Let sit for at least 1 more month
- If still cloudy, rack again and let sit longer
Confession time: I sometimes get impatient during this step, but every extra week of waiting truly improves your wine!
Step 7: Bottle Your Wine
The exciting finale to your winemaking journey!
- Sanitize bottles, corks, and bottling equipment
- Using your siphon, transfer wine to bottles
- Leave about 1 inch of space at the top
- Insert corks and store bottles on their sides
- Label with the type of wine and date
- Age for at least 3 months before tasting
- Prep Time: 60 minutes
- Cook Time: 0 minutes
- Category: Beverage
- Method: Fermentation
- Cuisine: American
Nutrition
- Serving Size: 5 oz
- Calories: 120
Keywords: homemade wine recipe, fruit wine making, berry wine fermentation, beginner winemaking guide, DIY wine recipe