There’s something so deeply satisfying about making your own jerky at home. Last weekend, as the autumn breeze rustled through our little yellow farmhouse in Asheville, I pulled out my trusty ground venison to create a batch of homemade jerky. This ground venison jerky recipe has become a staple in our home—not just because it’s delicious, but because it transforms humble game meat into something truly extraordinary with just five simple ingredients.
Print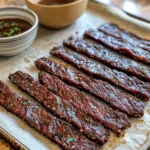
Ground venison jerky recipe: How to create the best 5 ingredients
- Total Time: 5 hours 20 minutes
- Yield: 1 pound of jerky 1x
Description
Craving a tasty, protein-packed snack? Explore this ground venison jerky recipe with just 5 ingredients and impress your friends. Discover now!
Ingredients
For this simple ground venison jerky recipe, you’ll need just 5 ingredients:
-
- 2 pounds ground venison
-
- 3 tablespoons Worcestershire sauce
-
- 3 tablespoons soy sauce (low-sodium works well too)
-
- 1 tablespoon liquid smoke
-
- 2 teaspoons freshly ground black pepper
Instructions
In a large bowl, combine the Worcestershire sauce, soy sauce, liquid smoke, and black pepper. Whisk them together until well combined. The mixture should have a deep, rich aroma that hints at the savory goodness to come.
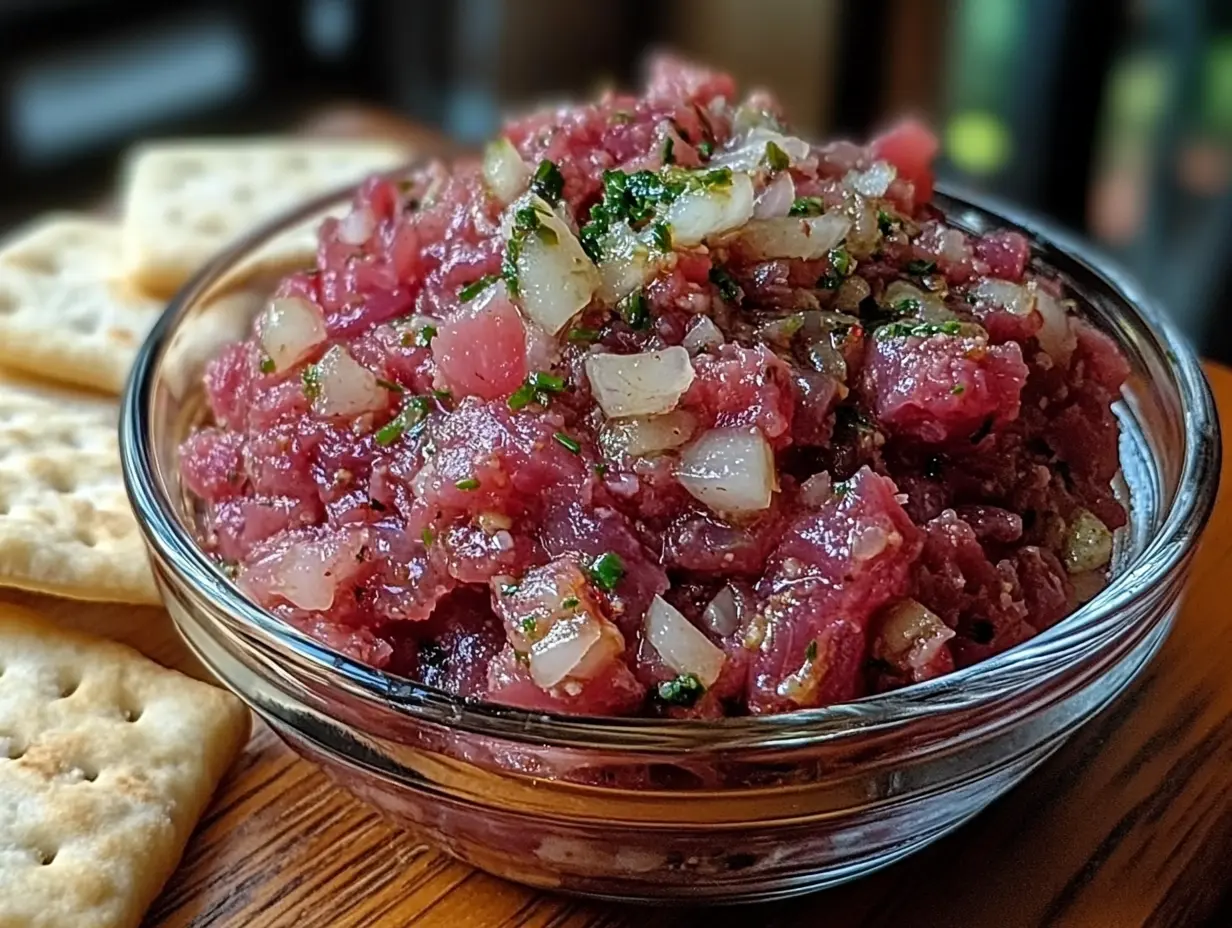
Add the ground venison to your bowl of seasonings. Using clean hands (my preferred method) or a sturdy spoon, mix everything together thoroughly. You want to ensure the seasonings are evenly distributed throughout the meat. Work the meat just enough to incorporate the seasonings – overworking can make the jerky tough.
Cover the bowl with plastic wrap and refrigerate for at least 2 hours, though overnight is even better. This resting time allows the flavors to penetrate the meat fully and makes the mixture easier to work with. Trust me, this step makes a world of difference in the final flavor!
When you’re ready to make your jerky, preheat your oven to its lowest setting (usually 170°F or 180°F). Line two large baking sheets with parchment paper or silicone baking mats.
You have two options here:
Option A: Place the meat mixture between two pieces of parchment paper and roll it out to about 1/8-inch thickness with a rolling pin. Then use a knife or pizza cutter to cut into strips about 1-inch wide and 4-inches long.
Option B: Use a jerky gun (if you have one) to pipe the meat mixture directly onto the prepared baking sheets in uniform strips.
I prefer Option A because it gives the jerky a more rustic, homemade look, but either method works beautifully.
Arrange the strips on your prepared baking sheets, making sure they don’t touch. Place the sheets in the oven, leaving the door slightly ajar to allow moisture to escape (I use a wooden spoon to prop it open).
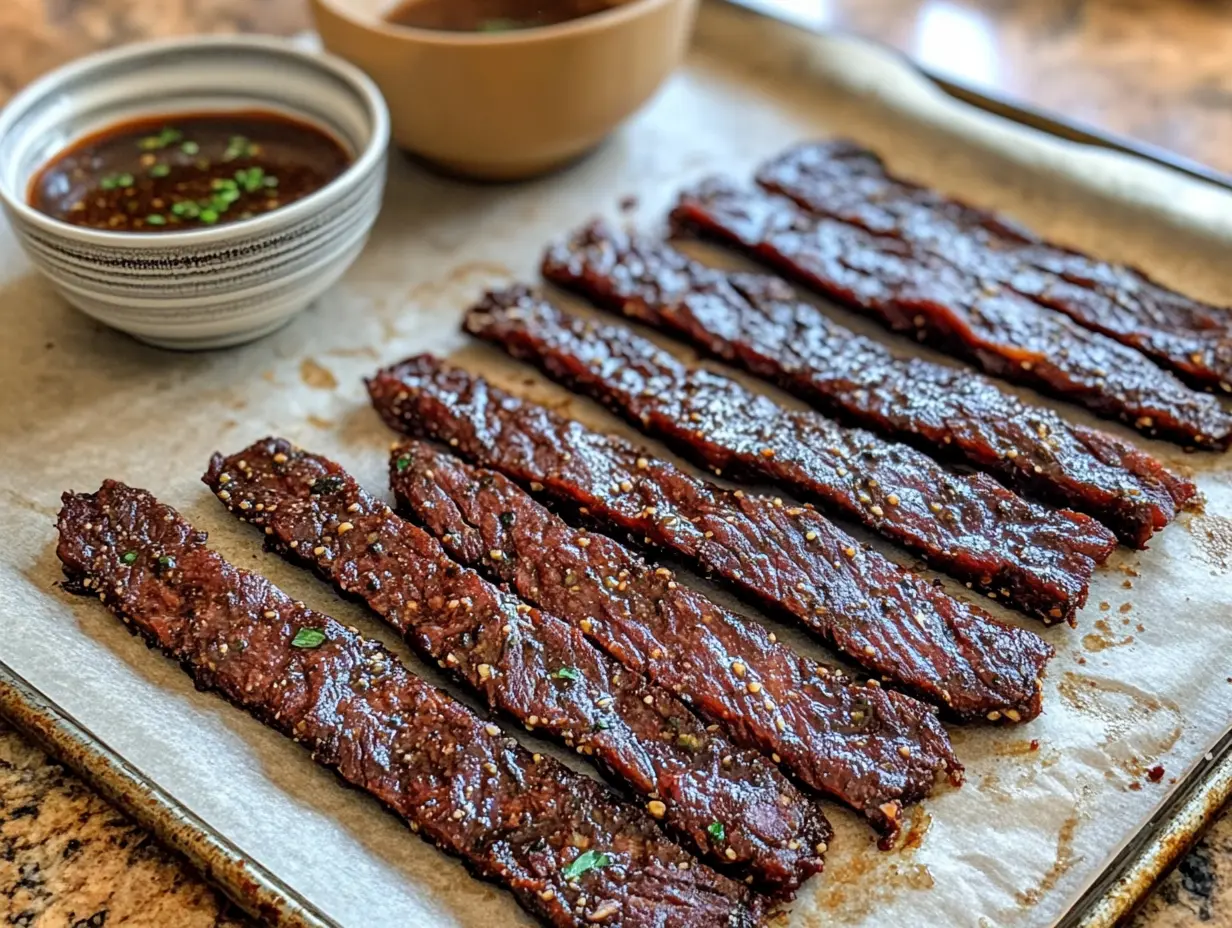
Dehydrate for 4-6 hours, rotating the pans halfway through. The jerky is done when it’s dry to the touch but still pliable – it should bend without breaking but shouldn’t feel moist.
Let the jerky cool completely on the baking sheets. As it cools, it will continue to dry slightly and firm up. Once fully cooled, store in an airtight container. For best quality, I recommend keeping it in the refrigerator, where it will last 2-3 weeks. At room temperature in a sealed container, it’s good for about 1 week.
- Prep Time: 20 minutes
- Cook Time: 300 minutes
- Category: Snack
- Method: Dehydration
- Cuisine: American
Nutrition
- Serving Size: 1 ounce
- Calories: 70 per serving
Keywords: ground venison jerky recipe, homemade venison jerky, easy venison jerky, ground venison recipes, healthy jerky recipe
If you’re like me, finding ways to use venison that the whole family enjoys can be a challenge. My husband Eric brings home venison after successful hunting seasons, and I’m always looking for creative ways to use this lean, protein-rich meat that even my picky eaters will devour. This jerky has been my absolute game-changer, and I can’t wait to share it with you!
Looking for other ways to use your venison? My venison cube steak recipes are another family favorite that transforms this lean game meat into a delicious dinner.
Why You’ll Love This Recipe
There are so many reasons this ground venison jerky recipe deserves a spot in your regular rotation:
- Just 5 ingredients: Nothing complicated or hard to find
- Budget-friendly: Makes use of ground venison which is more affordable than other cuts
- Kid-approved: Even my 6-year-old Lila and 3-year-old Caleb request this for snacks
- Travel-ready: Perfect for hiking, road trips, or tucking into lunch boxes
- Customizable: Once you master the basic recipe, you can experiment with different flavors
- No fancy equipment needed: No need for a professional dehydrator (though you can use one)
- Healthier alternative: Lower in fat and preservatives than store-bought jerky
The beauty of making jerky from ground venison instead of sliced whole cuts is that it’s more accessible and easier to work with. You don’t have to worry about slicing meat against the grain or dealing with tough, sinewy bits. And if you’re new to cooking with game meats, this is the perfect gateway recipe.
Ingredients
For this simple ground venison jerky recipe, you’ll need just 5 ingredients:
- 2 pounds ground venison
- 3 tablespoons Worcestershire sauce
- 3 tablespoons soy sauce (low-sodium works well too)
- 1 tablespoon liquid smoke
- 2 teaspoons freshly ground black pepper
Substitution tips:
- No venison? Lean ground beef (90/10 or leaner) can work, though the flavor will be different
- For gluten-free diets, use tamari instead of soy sauce and check your Worcestershire sauce is gluten-free
- You can add 1 teaspoon of garlic powder, onion powder, or crushed red pepper flakes for extra flavor
- For a sweet-spicy version, add 1 tablespoon of brown sugar or honey
Timing
- Prep Time: 20 minutes
- Chill Time: 2 hours
- Dehydration Time: 4-6 hours
- Total Time: 6-8 hours
Step-by-Step Instructions
Step 1: Mix Your Seasonings
In a large bowl, combine the Worcestershire sauce, soy sauce, liquid smoke, and black pepper. Whisk them together until well combined. The mixture should have a deep, rich aroma that hints at the savory goodness to come.
Step 2: Add and Mix the Venison
Add the ground venison to your bowl of seasonings. Using clean hands (my preferred method) or a sturdy spoon, mix everything together thoroughly. You want to ensure the seasonings are evenly distributed throughout the meat. Work the meat just enough to incorporate the seasonings – overworking can make the jerky tough.
Step 3: Chill the Mixture
Cover the bowl with plastic wrap and refrigerate for at least 2 hours, though overnight is even better. This resting time allows the flavors to penetrate the meat fully and makes the mixture easier to work with. Trust me, this step makes a world of difference in the final flavor!
Step 4: Prepare for Forming
When you’re ready to make your jerky, preheat your oven to its lowest setting (usually 170°F or 180°F). Line two large baking sheets with parchment paper or silicone baking mats.
Step 5: Form the Jerky Strips
You have two options here:
Option A: Place the meat mixture between two pieces of parchment paper and roll it out to about 1/8-inch thickness with a rolling pin. Then use a knife or pizza cutter to cut into strips about 1-inch wide and 4-inches long.
Option B: Use a jerky gun (if you have one) to pipe the meat mixture directly onto the prepared baking sheets in uniform strips.
I prefer Option A because it gives the jerky a more rustic, homemade look, but either method works beautifully.
Step 6: Dehydrate in the Oven
Arrange the strips on your prepared baking sheets, making sure they don’t touch. Place the sheets in the oven, leaving the door slightly ajar to allow moisture to escape (I use a wooden spoon to prop it open).
Dehydrate for 4-6 hours, rotating the pans halfway through. The jerky is done when it’s dry to the touch but still pliable – it should bend without breaking but shouldn’t feel moist.
Step 7: Cool and Store
Let the jerky cool completely on the baking sheets. As it cools, it will continue to dry slightly and firm up. Once fully cooled, store in an airtight container. For best quality, I recommend keeping it in the refrigerator, where it will last 2-3 weeks. At room temperature in a sealed container, it’s good for about 1 week.
Cooking Tips
After making countless batches of this ground venison jerky recipe over the years, I’ve picked up some handy tricks:
- Freeze the meat slightly before mixing with seasonings – this makes it easier to work with and helps maintain a good texture
- Use parchment paper when rolling out the meat to prevent sticking
- Check frequently during the dehydrating process – oven temperatures vary, and you don’t want to over-dry your jerky
- Blot excess moisture with paper towels halfway through drying if you notice any fat accumulating
- For extra thin jerky, place the meat in a zip-top bag, cut off one corner, and pipe it directly onto the baking sheet
- Let your jerky cool completely before storage – any residual warmth can cause condensation in your storage container
If you’re looking for another protein-packed snack option, my cottage cheese chips recipe is another family favorite that’s surprisingly delicious.
A Personal Hunting Story
Eric’s first successful deer hunt after we were married brought home more venison than I knew what to do with! Growing up in a family that didn’t hunt, I was intimidated by cooking game meat. My grandmother’s wisdom echoed in my mind: “Good cooking is about respecting your ingredients.”
I wanted to honor Eric’s hard work and the animal by using every bit. After experimenting with various recipes, this jerky became our favorite way to use ground venison. Now, jerky-making day is a family affair – Lila helps me mix the seasonings, and Caleb’s little hands help arrange the strips on the baking sheets (with plenty of quality control sampling, of course).
There’s something deeply satisfying about transforming a hunter’s bounty into nourishing food that connects us to simpler times, when people made jerky for preservation rather than convenience. Every time we make this recipe, I feel that connection to generations past who understood the value of good food made with care.
Nutritional Information
This ground venison jerky recipe isn’t just delicious – it’s nutritionally impressive too:
- High in protein: Approximately 13g per ounce
- Low in fat: Venison is naturally lean, containing about 1/5 the fat of beef
- Rich in iron: An excellent source of this essential mineral
- Good source of B vitamins: Particularly B12 and niacin
- Contains zinc: Important for immune function
- Low carb: Perfect for those following keto or low-carb eating plans
A typical 1-ounce serving contains approximately:
- Calories: 70
- Protein: 13g
- Fat: 1.5g
- Carbohydrates: 2g
- Sodium: 230mg (varies based on soy sauce used)
Healthier Alternatives
If you’re looking to make this recipe even healthier:
- Reduce sodium: Use low-sodium soy sauce and skip added salt
- Add herbs: Incorporate dried rosemary, thyme, or oregano for flavor without added sodium
- Try natural sweeteners: If you like a touch of sweetness, try a small amount of maple syrup instead of processed sugar
- Go organic: Use organic spices and condiments when possible
- Experiment with acid: A splash of apple cider vinegar adds flavor complexity and potential health benefits
Serving Suggestions
While this ground venison jerky is perfect on its own as a protein-packed snack, here are some of my favorite ways to enjoy it:
- Pack it as the protein component in homemade trail mix with nuts and dried fruits
- Dice it into small pieces to add to scrambled eggs for a hunter’s breakfast
- Serve on a charcuterie board alongside some sharp cheddar and grainy mustard
- Crumble into soups or stews for extra flavor and protein
- Pair with apple slices for a sweet-savory snack
- Include in lunch boxes alongside fresh veggies and dip
For a complete outdoor meal, pair this jerky with my 7-layer taco salad recipe – it’s perfect for those summer gatherings when you want something substantial but refreshing.
Common Mistakes to Avoid
Even the simplest recipes have potential pitfalls. Here’s how to avoid common jerky-making mistakes:
- Using meat that’s too fatty: Venison is naturally lean, but if substituting with beef, choose 93% lean or higher to prevent spoilage
- Rolling the meat too thick: Aim for 1/8-inch thickness for proper dehydration
- Crowding the oven: Leave space between jerky pieces for air circulation
- Over-dehydrating: Jerky should be dry but still pliable – if it shatters when bent, it’s too dry
- Under-dehydrating: Properly dried jerky shouldn’t feel moist or sticky
- Skipping the marinating time: Those few hours in the refrigerator make a huge difference in flavor penetration
- Storing while still warm: Always cool completely to prevent moisture buildup in storage
Storing & Reheating Tips
Proper storage is crucial for maintaining the quality and safety of your homemade jerky:
- Short-term storage: Store in an airtight container at room temperature for up to 1 week
- Extended storage: Keep refrigerated in an airtight container for 2-3 weeks
- Long-term storage: For up to 6 months, store in the freezer in a vacuum-sealed bag or freezer-safe container
- Moisture control: Add a food-grade desiccant packet to your storage container to absorb any excess moisture
- Quality check: Discard any jerky that develops an off smell, mold, or unusual texture
Since jerky is already fully cooked and dried, there’s no need to reheat it. However, if you prefer your jerky slightly warm, a few seconds in the microwave can soften it slightly.
FAQs
Can I make this ground venison jerky recipe in a dehydrator instead of an oven?
Absolutely! If you have a food dehydrator, set it to 160°F and spread the meat strips on the trays. Dehydrate for about 4-6 hours, checking periodically for doneness.
Is it safe to make jerky at home?
Yes, when proper food safety precautions are followed. The USDA recommends heating the meat to 160°F before the drying process to kill any bacteria. You can do this by baking the formed strips at 300°F for 10 minutes before reducing the temperature for dehydration.
Can I add more flavors to this basic recipe?
Definitely! Once you’ve mastered the basic ground venison jerky recipe, try adding teriyaki sauce, hot sauce, maple syrup, chili powder, or different herbs and spices to create your own signature flavor.
Final Thoughts
There’s something almost magical about transforming simple ingredients into something as satisfying as this ground venison jerky recipe. It connects us to cooking traditions that span generations and cultures, when preserving meat wasn’t just a hobby but a necessity.
In our modern world of convenience foods, taking the time to make something like jerky from scratch feels both rebellious and deeply nurturing. It’s my little way of slowing down, honoring good ingredients, and creating something truly special for my family.
Whether you’re a seasoned venison cook or trying game meat for the first time, this recipe offers a foolproof way to create delicious, protein-rich snacks that store beautifully. The simple five-ingredient approach means you can focus on technique rather than complicated shopping lists.
I hope this ground venison jerky becomes a favorite in your home as it has in ours. And if you’re looking for more ways to incorporate venison into your meals, don’t forget to check out my Canadian bacon recipe which can be adapted for venison with delicious results.
Happy cooking and happy snacking, friends!