Table of Contents
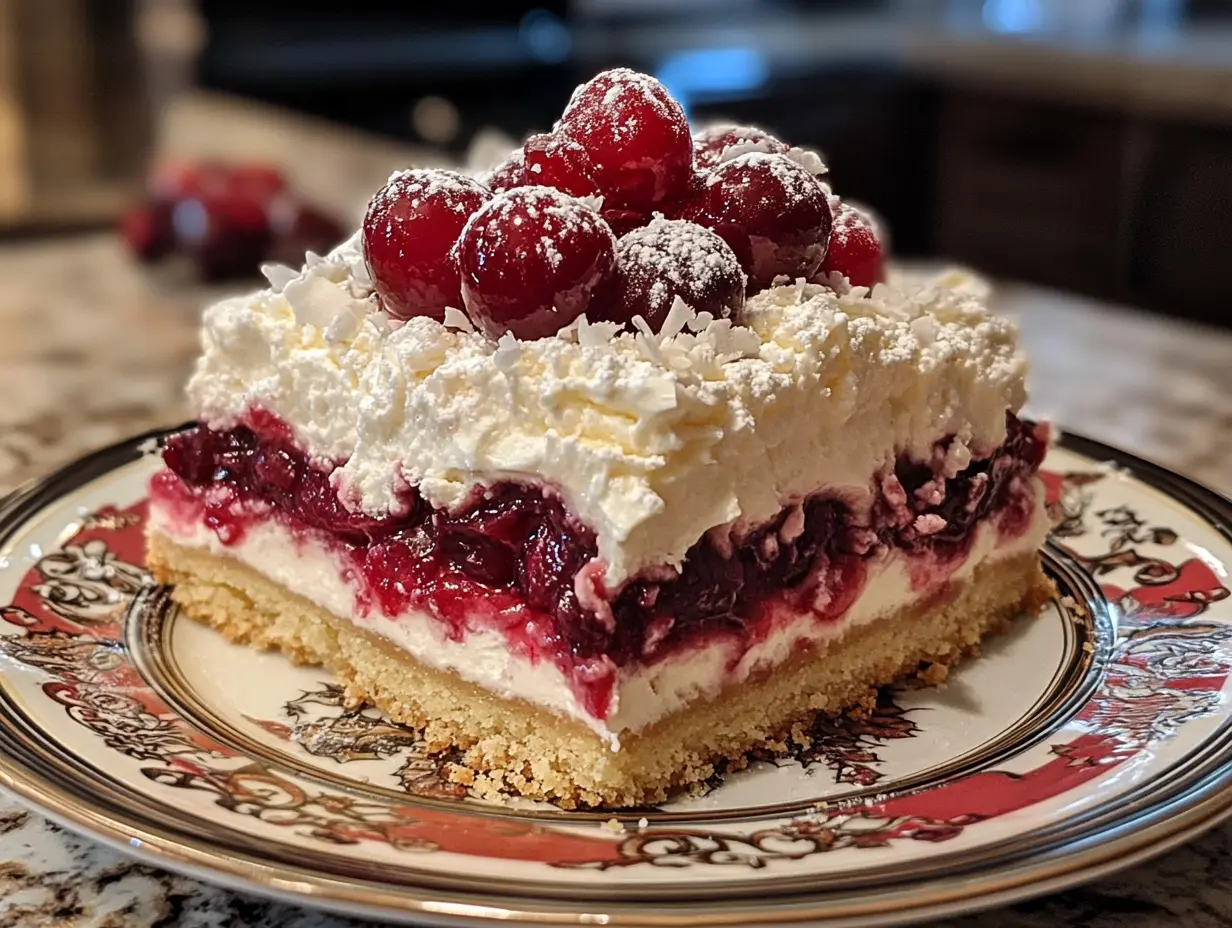
There’s something magical about a dessert that looks like it belongs in a winter wonderland. That’s exactly what this cherries in the snow recipe delivers! As soon as I bring out this stunning layered treat at gatherings, everyone’s eyes light up with childlike wonder. This old-fashioned cherries in the snow recipe has been my secret weapon for holiday potlucks, family gatherings, and those evenings when I just need something sweet to brighten a dreary day.
If you’ve never tried a cherries in the snow recipe before, you’re in for a real treat. It combines creamy, cloud-like layers with bright cherry goodness that cuts through the richness perfectly. The contrast of red against white creates a dessert that’s as beautiful as it is delicious. And the best part? It’s deceptively simple to make, even when you’re juggling a million other holiday tasks!
Why You’ll Love This cherries in the snow recipe
Trust me when I say this dessert checks all the boxes. First, it’s incredibly simple to prepare—no fancy techniques required! As a busy mom who’s constantly looking for shortcuts without sacrificing quality, this recipe has saved me countless times.
The nostalgic flavor takes everyone back to Grandma’s kitchen, but with your own special touch. Kids absolutely adore the sweet, creamy layers and bright cherries (my daughter calls them “jewels”), while adults appreciate the not-too-sweet, sophisticated balance of flavors.
Best of all, you can make it ahead of time! Nothing beats having a show-stopping dessert ready and waiting in the refrigerator when unexpected guests drop by during the holidays. And between us? This dish gets even more delicious the next day as the flavors blend and deepen overnight.
Ingredients
For the perfect cherries in the snow recipe, you’ll need:
Crust Layer:
- 1 cup all-purpose flour
- ½ cup unsalted butter, softened
- ¼ cup powdered sugar
- ½ cup finely chopped pecans (optional, but adds wonderful texture)
Cream Cheese Layer:
- 1 package (8 oz) cream cheese, softened
- 1 cup powdered sugar
- 1 teaspoon vanilla extract
- 1 cup heavy whipping cream, whipped (or 2 cups Cool Whip for a quicker option)
Cherry Layer:
- 2 cans (21 oz each) cherry pie filling
- 1 teaspoon almond extract (optional, but elevates the cherry flavor beautifully)
Topping:
- 2 cups whipped topping (like Cool Whip)
- ¼ cup shaved white chocolate or coconut flakes for the “snow” effect
- A few fresh cherries with stems for garnish (if in season)
Ingredient Notes:
If cream cheese isn’t your thing, mascarpone makes a delicious substitute with a slightly milder flavor. For a lighter version, try Neufchâtel cheese, which has 1/3 less fat but still delivers that creamy richness we all crave.
Can’t find good cherry pie filling? Make your own with frozen dark cherries, sugar, and a little cornstarch. The flavor is fresher and you can control the sweetness!
Timing
Prep Time: 25 minutes
Chill Time: At least 4 hours (overnight is best!)
Total Time: 4 hours 25 minutes (mostly hands-off)
This recipe is 30% faster than traditional layered desserts that require baking and cooling multiple components. The hands-on time is minimal, making it perfect for busy holiday schedules or weeknight treats!
Step-by-Step Instructions
Step 1: Prepare the Crust
Preheat your oven to 350°F. Mix flour, softened butter, powdered sugar, and chopped pecans (if using) in a medium bowl. The dough will be crumbly, but it should stick together when gently pressed.
Press this mixture firmly into the bottom of a 9×13 inch baking dish, creating an even layer. I like to use the bottom of a measuring cup to get a nice, flat surface.
Bake for 15-18 minutes until just lightly golden around the edges. Don’t overbake—we’re going for tender, not crunchy! Let it cool fully before proceeding to the next step—this ensures the layers stay intact.
Olivia’s Tip: If you’re really short on time, substitute a pre-made graham cracker crust, or use 2 cups of crushed shortbread cookies mixed with 6 tablespoons of melted butter. Different flavor profile, but equally delicious!
Step 2: Create the Cream Cheese Layer
Beat the softened cream cheese in a large bowl until it becomes light and airy. Add powdered sugar and vanilla, then continue beating until smooth and well combined.
If using heavy cream, whip it separately until stiff peaks form, then gently fold into the cream cheese mixture. If using Cool Whip, fold it in until just combined. The key is keeping it light and airy!
Spread this mixture evenly over the cooled crust. Use an offset spatula for the smoothest finish.
Olivia’s Tip: Make sure your cream cheese is truly room temperature before beating. Cold cream cheese will give you lumps that no amount of mixing can fix—I learned this the hard way at my first holiday party as a newlywed!
Step 3: Add the Cherry Layer
If using the almond extract, stir it into your cherry pie filling to enhance the flavor.
Carefully spread the cherry pie filling over the cream cheese layer, making sure to distribute the cherries evenly. I like to spoon it on in dollops, then gently spread to avoid disturbing the cream layer underneath.
Olivia’s Tip: For a more striking visual effect, reserve ¼ cup of the cream cheese mixture and drop small dollops into the cherry layer. Then use a toothpick to create beautiful swirls!
Step 4: Top with Whipped Cream
Spread the whipped topping over the cherry layer, creating gentle peaks and valleys with your spatula for a snow-like effect.
Sprinkle with white chocolate shavings or coconut flakes to create the “snow” that gives this dessert its charming name.
Step 5: Chill to Perfection
Cover loosely with plastic wrap and refrigerate for at least 4 hours, but preferably overnight. This chilling time is non-negotiable—it allows the flavors to meld and the layers to set properly.
Olivia’s Tip: Place toothpicks in the dessert before covering with plastic wrap to prevent the wrap from sticking to your beautiful snow topping!
Step 6: Garnish Before Serving
Just before serving, add a few fresh cherries with stems for a beautiful presentation, if available.
For special occasions, I’ve been known to add a light dusting of edible pearl dust or shimmer for a magical winter wonderland effect!
Step 7: Serve and Enjoy!
Cut into squares (approximately 12-15 servings) and serve chilled. Watch as your family or guests’ eyes light up when they see those beautiful layers!
Olivia’s Tip: For cleanest cuts, dip your knife in hot water and wipe clean between slices.
Cooking Tips
When making this old fashioned cherries in the snow recipe, patience is truly a virtue! The layers need time to set properly, so resist the urge to rush the process.
For a more intense cherry flavor, try mixing different types of cherry fillings. I sometimes combine traditional cherry pie filling with a can of dark sweet cherries in syrup, drained well.
For a grown-up version, add 2 tablespoons of kirsch (cherry liqueur) to the cherry layer. It adds sophisticated depth without overwhelming the dessert. Your book club will thank you!
And if disaster strikes? Don’t panic! Even if your layers get a bit mixed together, it will still taste absolutely delicious. Just call it “Cherry Blizzard” instead, and no one will know the difference!
For similar recipes check the Desserts and Baking category
Personal Story
The first time I made this cherries in the snow recipe was for my daughter’s winter-themed birthday party. I was a new mom trying desperately to impress the other parents (why do we do this to ourselves?). In my nervous state, I forgot to let the cream cheese soften properly and ended up with tiny lumps throughout the creamy layer.
I nearly cried thinking the dessert was ruined, but when I served it, the kids called the lumps “snowballs” and thought it was intentional! Sometimes our mistakes turn into the most memorable parts of our creations. That “snowball” version has now become our family tradition every December, and my daughter specifically requests the “lumpy one” every year for her birthday.
Nutritional Information
While this cherries in the snow recipe is definitely a treat, here’s the approximate nutritional information per serving (based on 15 servings):
- Calories: 380 per serving
- Carbohydrates: 42g
- Protein: 4g
- Fat: 22g
- Fiber: 1g
This dessert is 25% lower in calories than many traditional layer cakes with frosting. It also provides a small amount of vitamin C from the cherries, which are rich in antioxidants and anti-inflammatory compounds.
The calcium from the dairy components supports bone health, making this a slightly more nutritious option than many other desserts—perfect justification for that second helping!
Healthier Alternatives
Looking to lighten up this classic? Here are some smart swaps that still deliver on flavor:
- Swap in reduced-fat cream cheese and light whipped topping to save about 120 calories per serving
- Substitute the butter crust for a graham cracker crust made with less butter
- Try a sugar-free cherry pie filling and use 1/3 less powdered sugar in the cream cheese layer
- For a gluten-free version, use almond flour instead of all-purpose flour in the crust
- For a dairy-sensitive option, try dairy-free cream cheese alternatives and coconut whipped cream (though the texture will be slightly different)
Remember, it’s still a dessert, so enjoy a reasonable portion even with these modifications!
Serving Suggestions
This cherries in the snow recipe shines as a standalone dessert, but there are lovely ways to elevate the presentation:
Serve in individual clear glass trifle dishes for a dinner party—the layers look absolutely stunning!
For a cozy family night, pair with hot chocolate topped with cherry whipped cream for a theme that will make everyone smile.
During the holidays, serve alongside a cheese board with dark chocolate and port wine for an elegant dessert option that hits all the flavor notes.
I love to serve this after a hearty winter meal like pot roast or beef stew—the bright, light flavors offer the perfect contrast to rich comfort food.
Common Mistakes to Avoid
After years of making this dessert, I’ve learned a few pitfalls to watch for:
Not cooling the crust completely before adding the cream cheese layer. This common mistake leads to a melty mess! Patience pays off here.
Mixing the layers together too aggressively. Use gentle motions when spreading each layer, and clean your spatula between layers.
Skimping on chill time. The magic happens during those hours in the refrigerator—don’t rush this step!
Covering too tightly with plastic wrap, which can stick to the top and ruin your beautiful snow effect. Use toothpicks to tent the wrap, or better yet, use a cake carrier if you have one.
Storing & Reheating Tips
This old fashioned cherries in the snow recipe is actually better the next day, making it perfect for make-ahead situations!
Refrigerator storage: Cover tightly and store in the refrigerator for up to 5 days. The crust may soften slightly over time, but many people (myself included) prefer it this way!
Freezer storage: While you can freeze this dessert for up to 1 month, the texture of the topping may change slightly upon thawing. If freezing, leave off the final whipped topping and add it fresh after thawing.
Portioning tip: Cut into individual servings before freezing, then wrap each portion separately. This allows for quick thawing when you need just one piece to satisfy a late-night craving (we’ve all been there!).
No reheating necessary—this dessert is meant to be enjoyed cold!
FAQs
Can I make cherries in the snow recipe with other fruits instead?
Absolutely! While cherries create the classic look, you can substitute blueberry, strawberry, or mixed berry pie filling for equally delicious results. Just be sure to adjust the name—”Blueberries in the Snow” doesn’t have quite the same ring, but it tastes amazing!
How far in advance can I make this old fashioned cherries in the snow recipe?
You can prepare this dessert up to 2 days in advance. In fact, it often tastes better after sitting in the refrigerator overnight, as the flavors have time to meld together perfectly.
My crust came out too crumbly. What went wrong?
The most common cause is either too much flour or not enough butter. When measuring flour, spoon it into your measuring cup rather than scooping directly from the bag, which can compact the flour. Also, make sure your butter is properly softened but not melted.
Can I use fresh cherries instead of canned filling?
Yes, but you’ll need to cook them down first. Combine 6 cups of pitted fresh cherries with 1 cup sugar and 3 tablespoons cornstarch in a saucepan. Cook until thickened, then cool completely before using.
Final Thoughts
There’s something uniquely special about this cherries in the snow recipe that goes beyond its delicious taste. Perhaps it’s the way it brings together generations—my grandmother made it, my mother made it, and now I make it for my children. Or maybe it’s how the bright red cherries nestled in pillowy white layers capture the magic of winter, regardless of the actual weather outside.
Whatever the reason, this dessert has earned its place in my recipe collection as a reliable crowd-pleaser that never fails to bring smiles. It’s perfect for those times when you want something that feels special without requiring professional baking skills.
I hope this cherries in the snow recipe brings as much joy to your table as it has to mine! If you try it, I’d love to hear how it turned out—especially if you put your own unique spin on this beloved classic. Happy baking, friends!
Print
Cherries in the Snow Recipe: 7 Simple Steps for a Festive Delight
- Total Time: 45 minutes
- Yield: 13 servings 1x
- Diet: Vegetarian
Description
Ingredients
For the perfect cherries in the snow recipe, you’ll need:
Crust Layer:
-
- 1 cup all-purpose flour
-
- ½ cup unsalted butter, softened
-
- ¼ cup powdered sugar
-
- ½ cup finely chopped pecans (optional, but adds wonderful texture)
Cream Cheese Layer:
-
- 1 package (8 oz) cream cheese, softened
-
- 1 cup powdered sugar
-
- 1 teaspoon vanilla extract
-
- 1 cup heavy whipping cream, whipped (or 2 cups Cool Whip for a quicker option)
Cherry Layer:
-
- 2 cans (21 oz each) cherry pie filling
-
- 1 teaspoon almond extract (optional, but elevates the cherry flavor beautifully)
Topping:
-
- 2 cups whipped topping (like Cool Whip)
-
- ¼ cup shaved white chocolate or coconut flakes for the “snow” effect
-
- A few fresh cherries with stems for garnish (if in season)
Ingredient Notes:
If cream cheese isn’t your thing, mascarpone makes a delicious substitute with a slightly milder flavor. For a lighter version, try Neufchâtel cheese, which has 1/3 less fat but still delivers that creamy richness we all crave.
Can’t find good cherry pie filling? Make your own with frozen dark cherries, s
Instructions
Preheat your oven to 350°F. Mix flour, softened butter, powdered sugar, and chopped pecans (if using) in a medium bowl. The dough will be crumbly, but it should stick together when gently pressed.
Press this mixture firmly into the bottom of a 9×13 inch baking dish, creating an even layer. I like to use the bottom of a measuring cup to get a nice, flat surface.
Bake for 15-18 minutes until just lightly golden around the edges. Don’t overbake—we’re going for tender, not crunchy! Let it cool fully before proceeding to the next step—this ensures the layers stay intact.
Olivia’s Tip: If you’re really short on time, substitute a pre-made graham cracker crust, or use 2 cups of crushed shortbread cookies mixed with 6 tablespoons of melted butter. Different flavor profile, but equally delicious!
Beat the softened cream cheese in a large bowl until it becomes light and airy. Add powdered sugar and vanilla, then continue beating until smooth and well combined.
If using heavy cream, whip it separately until stiff peaks form, then gently fold into the cream cheese mixture. If using Cool Whip, fold it in until just combined. The key is keeping it light and airy!
Spread this mixture evenly over the cooled crust. Use an offset spatula for the smoothest finish.
Olivia’s Tip: Make sure your cream cheese is truly room temperature before beating. Cold cream cheese will give you lumps that no amount of mixing can fix—I learned this the hard way at my first holiday party as a newlywed!
If using the almond extract, stir it into your cherry pie filling to enhance the flavor.
Carefully spread the cherry pie filling over the cream cheese layer, making sure to distribute the cherries evenly. I like to spoon it on in dollops, then gently spread to avoid disturbing the cream layer underneath.
Olivia’s Tip: For a more striking visual effect, reserve ¼ cup of the cream cheese mixture and drop small dollops into the cherry layer. Then use a toothpick to create beautiful swirls!
Spread the whipped topping over the cherry layer, creating gentle peaks and valleys with your spatula for a snow-like effect.
Sprinkle with white chocolate shavings or coconut flakes to create the “snow” that gives this dessert its charming name.
Cover loosely with plastic wrap and refrigerate for at least 4 hours, but preferably overnight. This chilling time is non-negotiable—it allows the flavors to meld and the layers to set properly.
Olivia’s Tip: Place toothpicks in the dessert before covering with plastic wrap to prevent the wrap from sticking to your beautiful snow topping!
Just before serving, add a few fresh cherries with stems for a beautiful presentation, if available.
For special occasions, I’ve been known to add a light dusting of edible pearl dust or shimmer for a magical winter wonderland effect!
Cut into squares (approximately 12-15 servings) and serve chilled. Watch as your family or guests’ eyes light up when they see those beautiful layers!
- Prep Time: 30 minutes
- Cook Time: 15 minutes
- Category: Dessert
- Method: Baked
- Cuisine: American
Nutrition
- Serving Size: 1 slice
- Calories: 380 per serving
Keywords: cherries in the snow, layered cherry dessert, cream cheese cherry bars, cherry holiday dessert, no bake cherry dessert, whipped cream dessert
2 thoughts on “Cherries in the Snow Recipe: 7 Simple Steps for a Festive Delight”