Table of Contents
There’s something almost magical about the morning air when bacon is sizzling in the kitchen. That intoxicating aroma that draws everyone to the table, even before coffee has been poured. In my little yellow farmhouse here in Asheville, I’ve been experimenting with a venison bacon recipe that has completely changed our weekend breakfast routine. If you’re looking to transform that deer meat in your freezer into something extraordinary, you’re in the right place!
When my husband Eric brought home his first deer of the season last fall, I’ll admit I was slightly overwhelmed. Sure, we’d made the usual venison chili and steaks, but I wanted something different—something that would make use of those leaner cuts while delivering the comfort of a familiar favorite. That’s when I stumbled upon the idea of creating venison bacon, and let me tell you, it’s been a game-changer for our family.
If you’ve explored some of my other game meat recipes like my venison cube steak recipes, you know I’m all about making wild game approachable and family-friendly. This venison bacon recipe follows that same philosophy—transforming something potentially intimidating into a delicious staple you’ll want to make again and again.
Why You’ll Love This Recipe
There’s something deeply satisfying about transforming wild game into something as universally beloved as bacon. This venison bacon recipe isn’t just a culinary adventure—it’s a practical way to use every part of the deer with delicious results.
First, it’s incredibly versatile. Once you’ve made your venison bacon, you can use it anywhere you’d use traditional pork bacon—in breakfast sandwiches, crumbled over salads, or even as a topping for my bagel dip recipe with cream cheese.
Second, it’s healthier than store-bought bacon. Venison is naturally leaner than pork, and when you make bacon at home, you control exactly what goes into the cure—no mysterious additives or preservatives here!
Finally, there’s the undeniable satisfaction of crafting something special from scratch. When my 6-year-old Lila proudly announces to guests that “Mommy made this bacon from a deer,” I can’t help but feel a sense of accomplishment that no store-bought product could ever provide.
Ingredients
For this venison bacon recipe, you’ll need:
For the meat:
- 5 pounds of venison roast (shoulder or hindquarter works best)
- 2 pounds of pork fat (ask your local butcher for fatback or pork belly fat)
For the cure:
- 3 tablespoons kosher salt (not table salt)
- 2 tablespoons brown sugar
- 2 teaspoons pink curing salt #1 (Prague powder)
- 2 tablespoons black pepper, coarsely ground
- 1 tablespoon maple syrup
- 2 teaspoons garlic powder
- 1 teaspoon onion powder
- 1 teaspoon smoked paprika
- ½ teaspoon ground coriander
- ¼ teaspoon ground nutmeg
Substitution tips: If you don’t have pink curing salt, you can still make this recipe as a fresh bacon (cook thoroughly and use immediately or freeze). For a different flavor profile, try apple cider syrup instead of maple, or add 1 teaspoon of ground juniper berries for a more complex taste.
Timing
- Prep time: 1 hour
- Cure time: 5-7 days
- Final prep: 30 minutes
- Cook time: 3-4 hours for smoking, or 30 minutes for baking
- Total time: 6-8 days (mostly hands-off curing time)
Step-by-Step Instructions
Step 1: Prepare the Meat
Start by partially freezing your venison roast and pork fat for about 1-2 hours until firm but not completely frozen. This makes it much easier to slice and grind.
Cut the venison and pork fat into 1-inch chunks. You’ll want to aim for a ratio of about 70% venison to 30% pork fat. This fat content is crucial—it’s what gives your venison bacon that authentic bacon texture and prevents it from becoming too dry.
Eric laughs at how meticulous I get during this step, but trust me, taking your time here makes all the difference in the final product. The first time I made this, I rushed and had uneven fat distribution—rookie mistake!
Step 2: Grind and Mix
Using a meat grinder with a medium plate (about 3/8-inch holes), grind the venison and pork fat together, alternating between the two to ensure even distribution.
Place the ground mixture into a large bowl and add all your cure ingredients. With clean hands (I keep disposable gloves in the kitchen for just this purpose), mix thoroughly until the spices are evenly distributed and the meat mixture becomes slightly sticky.
At this point, I always take a small spoonful of the mixture, cook it in a small frying pan, and taste for seasoning. This is your only chance to adjust the flavor before curing, so don’t skip this step!
Step 3: Form and Cure
Line a 9×13 inch baking dish with plastic wrap, allowing excess to hang over the sides. Press the meat mixture firmly into the dish, creating an even layer. The thickness is up to you—I prefer about 1.5 inches for the perfect bacon slice.
Fold the excess plastic wrap over the top, then place a second baking dish on top. Add a few heavy canned goods to weigh it down. This pressure helps the meat bind together during curing.
Place the weighted meat in the refrigerator and let it cure for 5-7 days. The curing process is essential for developing those bacon flavors and ensuring food safety. Turn the meat slab over once daily during curing.
Step 4: Prepare for Cooking
After curing, remove the meat from the refrigerator and unwrap. Rinse the slab under cold water and pat dry with paper towels. The rinsing removes excess salt that could make your bacon too salty.
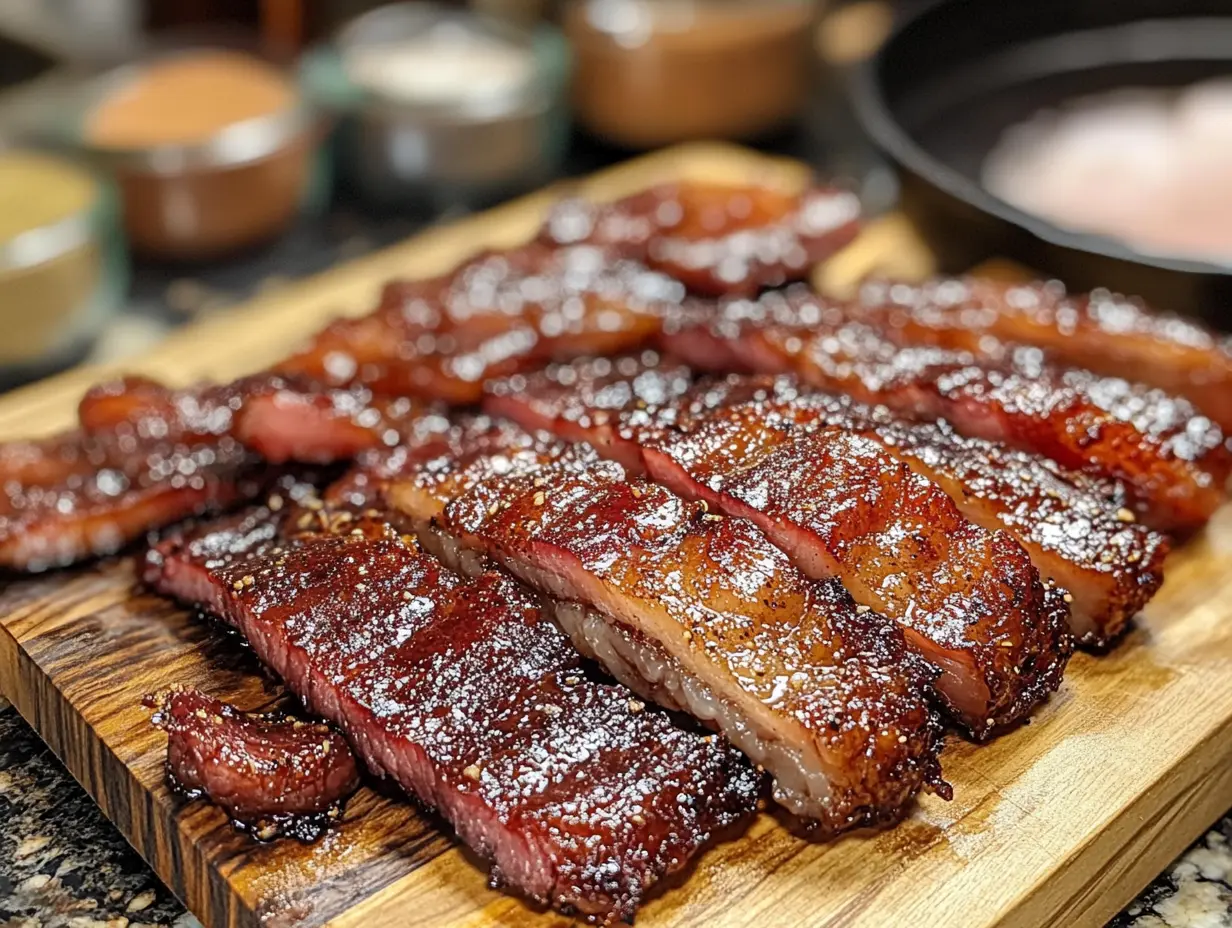
At this point, you can slice a small piece and fry it up to test the flavor. The bacon will be a deep reddish-brown color and firm to the touch.
If smoking, let the slab sit uncovered in the refrigerator for 4-6 hours or overnight to develop a pellicle (a tacky surface that helps smoke adhere).
Step 5: Cook to Perfection
You have two excellent options for finishing your venison bacon:
Smoking method: Preheat your smoker to 200°F. Use apple, cherry, or hickory wood for the best flavor. Smoke the bacon until it reaches an internal temperature of 150°F (about 3-4 hours). Let it cool completely before slicing.
Oven method: Preheat your oven to 200°F. Place the bacon on a rack over a baking sheet to catch drippings. Bake until it reaches an internal temperature of 150°F (about 2-3 hours). For added smoky flavor, add a few drops of liquid smoke to the meat mixture during Step 2.
Once cooled, slice your bacon to your preferred thickness. I recommend using a meat slicer for consistent results, but a sharp knife works well too. Package in airtight containers or vacuum-sealed bags and refrigerate for up to 2 weeks or freeze for up to 6 months.
Cooking Tips
The secret to exceptional venison bacon lies in the details. First, temperature control is crucial. Whether smoking or baking, keep the temperature low and slow—around 200°F. Higher heat will cause the fat to render out too quickly, leaving you with dry bacon.
For slicing, partially freeze your finished bacon for about 30 minutes. This firms it up and makes it much easier to get those perfect, even slices. I learned this trick after a frustrating morning of mangled bacon slices that had Lila giggling at my kitchen meltdown.
If you’re cooking your venison bacon in a pan, start with a cold skillet. Place the bacon in a cold pan, then turn the heat to medium-low. This gradual temperature increase allows the fat to render properly, giving you crispier results without burning.
Don’t discard that beautiful bacon grease! Strain it through a fine-mesh sieve and store it in a jar in the refrigerator. It adds incredible flavor to scrambled eggs, sautéed vegetables, or my family’s favorite cornbread recipe.
Personal Story
Last hunting season brought an unexpected challenge. Eric had harvested two deer, and our freezer was overflowing with venison. Our 3-year-old Caleb had also just gone through a phase of refusing any meat that wasn’t in nugget form—you know how toddlers can be!
Determined not to waste a single ounce of that precious meat, I started experimenting with this venison bacon recipe. The first batch was good but not great. By the third attempt, I had perfected the balance of fat to lean and nailed the spice blend.
The true test came at our family’s Sunday breakfast. I placed a plate of crispy venison bacon at the table without announcement. Caleb, my picky eater, grabbed a piece and exclaimed, “Mommy, this is the BEST bacon!” His little face lit up with such joy that Eric and I exchanged knowing glances over our coffee mugs. Not only had we found a delicious way to use our venison, but we’d also expanded our little one’s palate—a double win in my book.
Nutritional Information
Venison bacon offers some impressive nutritional benefits compared to traditional pork bacon. A 2-ounce serving contains approximately:
- Calories: 180 (compared to approximately 270 for pork bacon)
- Protein: 14g (significantly higher than pork bacon’s 8g)
- Fat: 12g (lower than pork bacon’s 22g)
- Sodium: 480mg (varies based on your curing recipe)
Venison is rich in iron, B vitamins (especially B12), and zinc. It’s also naturally free of antibiotics and hormones often found in commercial meats. The controlled addition of pork fat still keeps the overall fat content lower than commercial bacon while providing necessary moisture and flavor.
Healthier Alternatives
If you’re watching your sodium intake, you can reduce the salt in the cure by up to a third (though not the curing salt, which is essential for food safety). Compensate for flavor with additional herbs like thyme or rosemary.
For those avoiding sugar, try using monk fruit sweetener instead of brown sugar, or simply reduce the amount. The sugar in the cure helps balance the saltiness rather than making the bacon sweet, so a little goes a long way.
If you’re limiting nitrates (found in the pink curing salt), you can experiment with a nitrate-free version using celery powder, which contains natural nitrates. However, be aware that this should be consumed quickly and may not have the same preservation qualities.
Serving Suggestions
Venison bacon elevates so many dishes beyond the standard breakfast plate. Here are some of my favorite ways to serve it:
For breakfast, pair thick-cut venison bacon with sweet potato hash and sunny-side-up eggs for a hunter’s breakfast that will keep you satisfied until dinner.
For lunch, crumble crispy venison bacon over a hearty salad with apples, walnuts, and blue cheese. The sweet-savory combination is outstanding.
For dinner, wrap venison bacon around lean game bird breasts (quail, pheasant, or even chicken) before roasting. The bacon bastes the lean meat, preventing it from drying out.
For appetizers, nothing disappears faster at our gatherings than venison bacon-wrapped dates stuffed with goat cheese. The combination of smoky, sweet, and tangy flavors is absolutely irresistible.
Common Mistakes to Avoid
Through plenty of trial and error, I’ve identified the most common pitfalls when making venison bacon:
Not enough fat: Venison is extremely lean, and without sufficient fat (aim for that 70/30 ratio), your bacon will be dry and crumbly. Don’t try to make this leaner—embrace the fat for authentic bacon texture.
Over-smoking: Game meats can quickly become overwhelmed by too much smoke. If smoking your bacon, use milder woods like apple or cherry rather than mesquite or heavy hickory.
Slicing too thin before curing: If you’re making a whole slab bacon-style recipe, keep the meat chunky before grinding. Fine grinding creates a texture more like sausage than bacon.
Rushing the cure: Those 5-7 days in the refrigerator aren’t optional. The curing process is essential for food safety and flavor development.
Cooking at high heat: Whether in a pan or in the oven, venison bacon should always be cooked at a lower temperature than store-bought bacon to prevent the fat from rendering out too quickly.
Storing & Reheating Tips
After all your hard work, proper storage ensures your venison bacon stays delicious for as long as possible:
For refrigerator storage, wrap tightly in parchment paper, then in aluminum foil, and store in the coldest part of your refrigerator for up to 2 weeks. The paper absorbs excess moisture while the foil protects from air.
For freezer storage, I recommend vacuum sealing in portion-sized packages. If you don’t have a vacuum sealer, wrap tightly in plastic wrap and then foil before placing in a freezer bag with the air pressed out. Properly stored, venison bacon will maintain quality for up to 6 months in the freezer.
To reheat previously cooked venison bacon, the oven is your friend. Place bacon on a wire rack over a baking sheet in a 300°F oven for about 5-8 minutes. This method crisps it back up without making it too dry.
FAQs
Can I make venison bacon without a meat grinder?
Yes! While a grinder gives the best texture, you can finely chop the meat and fat with a sharp knife. Alternatively, ask your local butcher if they’ll grind the meat for you—many will if you call ahead.
Is the pink curing salt absolutely necessary?
For traditional bacon that can be stored safely for extended periods, yes. If you choose to make it without, you’ll be creating “fresh bacon” that must be fully cooked right away and treated like any other fresh sausage in terms of storage.
Can I use cuts other than roasts for this recipe?
Absolutely! Any lean cut of venison works well. Shoulders and hindquarters are popular choices because they’re abundant and leaner, but tenderloin makes luxurious bacon if you’re feeling indulgent.
Final Thoughts
There’s something deeply satisfying about transforming a humble venison roast into delicious homemade bacon. This venison bacon recipe does more than just provide a hearty breakfast—it connects us to traditional food preservation methods while making use of the entire animal, something I believe is important to teach our children.
Each time I make a batch of venison bacon, I’m reminded of why I fell in love with cooking in the first place. It’s not just about creating delicious food (though that’s certainly a perk!); it’s about the stories we share around the table, the traditions we create, and the self-sufficiency that comes from making something from scratch.
I hope this venison bacon recipe brings as much joy to your family as it has to mine. Whether you’re an experienced hunter looking for new ways to enjoy your harvest or simply an adventurous eater wanting to try something different, I’d love to hear how your bacon turns out. Happy cooking!
Print
Venison bacon recipe: How to create the best flavor in 5 steps
- Total Time: 5 hours
- Yield: 6 pounds of bacon 1x
Description
Ingredients
For this venison bacon recipe, you’ll need:
For the meat:
- 5 pounds of venison roast (shoulder or hindquarter works best)
- 2 pounds of pork fat (ask your local butcher for fatback or pork belly fat)
For the cure:
- 3 tablespoons kosher salt (not table salt)
- 2 tablespoons brown sugar
- 2 teaspoons pink curing salt #1 (Prague powder)
- 2 tablespoons black pepper, coarsely ground
- 1 tablespoon maple syrup
- 2 teaspoons garlic powder
- 1 teaspoon onion powder
- 1 teaspoon smoked paprika
- ½ teaspoon ground coriander
- ¼ teaspoon ground nutmeg
Instructions
Start by partially freezing your venison roast and pork fat for about 1-2 hours until firm but not completely frozen. This makes it much easier to slice and grind.
Cut the venison and pork fat into 1-inch chunks. You’ll want to aim for a ratio of about 70% venison to 30% pork fat. This fat content is crucial—it’s what gives your venison bacon that authentic bacon texture and prevents it from becoming too dry.
Eric laughs at how meticulous I get during this step, but trust me, taking your time here makes all the difference in the final product. The first time I made this, I rushed and had uneven fat distribution—rookie mistake!
Using a meat grinder with a medium plate (about 3/8-inch holes), grind the venison and pork fat together, alternating between the two to ensure even distribution.
Place the ground mixture into a large bowl and add all your cure ingredients. With clean hands (I keep disposable gloves in the kitchen for just this purpose), mix thoroughly until the spices are evenly distributed and the meat mixture becomes slightly sticky.
At this point, I always take a small spoonful of the mixture, cook it in a small frying pan, and taste for seasoning. This is your only chance to adjust the flavor before curing, so don’t skip this step!
Line a 9×13 inch baking dish with plastic wrap, allowing excess to hang over the sides. Press the meat mixture firmly into the dish, creating an even layer. The thickness is up to you—I prefer about 1.5 inches for the perfect bacon slice.
Fold the excess plastic wrap over the top, then place a second baking dish on top. Add a few heavy canned goods to weigh it down. This pressure helps the meat bind together during curing.
Place the weighted meat in the refrigerator and let it cure for 5-7 days. The curing process is essential for developing those bacon flavors and ensuring food safety. Turn the meat slab over once daily during curing.
After curing, remove the meat from the refrigerator and unwrap. Rinse the slab under cold water and pat dry with paper towels. The rinsing removes excess salt that could make your bacon too salty.
At this point, you can slice a small piece and fry it up to test the flavor. The bacon will be a deep reddish-brown color and firm to the touch.
If smoking, let the slab sit uncovered in the refrigerator for 4-6 hours or overnight to develop a pellicle (a tacky surface that helps smoke adhere).
You have two excellent options for finishing your venison bacon:
Smoking method: Preheat your smoker to 200°F. Use apple, cherry, or hickory wood for the best flavor. Smoke the bacon until it reaches an internal temperature of 150°F (about 3-4 hours). Let it cool completely before slicing.
Oven method: Preheat your oven to 200°F. Place the bacon on a rack over a baking sheet to catch drippings. Bake until it reaches an internal temperature of 150°F (about 2-3 hours). For added smoky flavor, add a few drops of liquid smoke to the meat mixture during Step 2.
Once cooled, slice your bacon to your preferred thickness. I recommend using a meat slicer for consistent results, but a sharp knife works well too. Package in airtight containers or vacuum-sealed bags and refrigerate for up to 2 weeks or freeze for up to 6 months.
- Prep Time: 60 minutes
- Cook Time: 240 minutes
- Category: Breakfast
- Method: Baking
- Cuisine: American
Nutrition
- Serving Size: 2 ounces
- Calories: 180 per serving
Keywords: venison bacon, game meat, homemade bacon, deer meat recipes, hunting recipes