Table of Contents
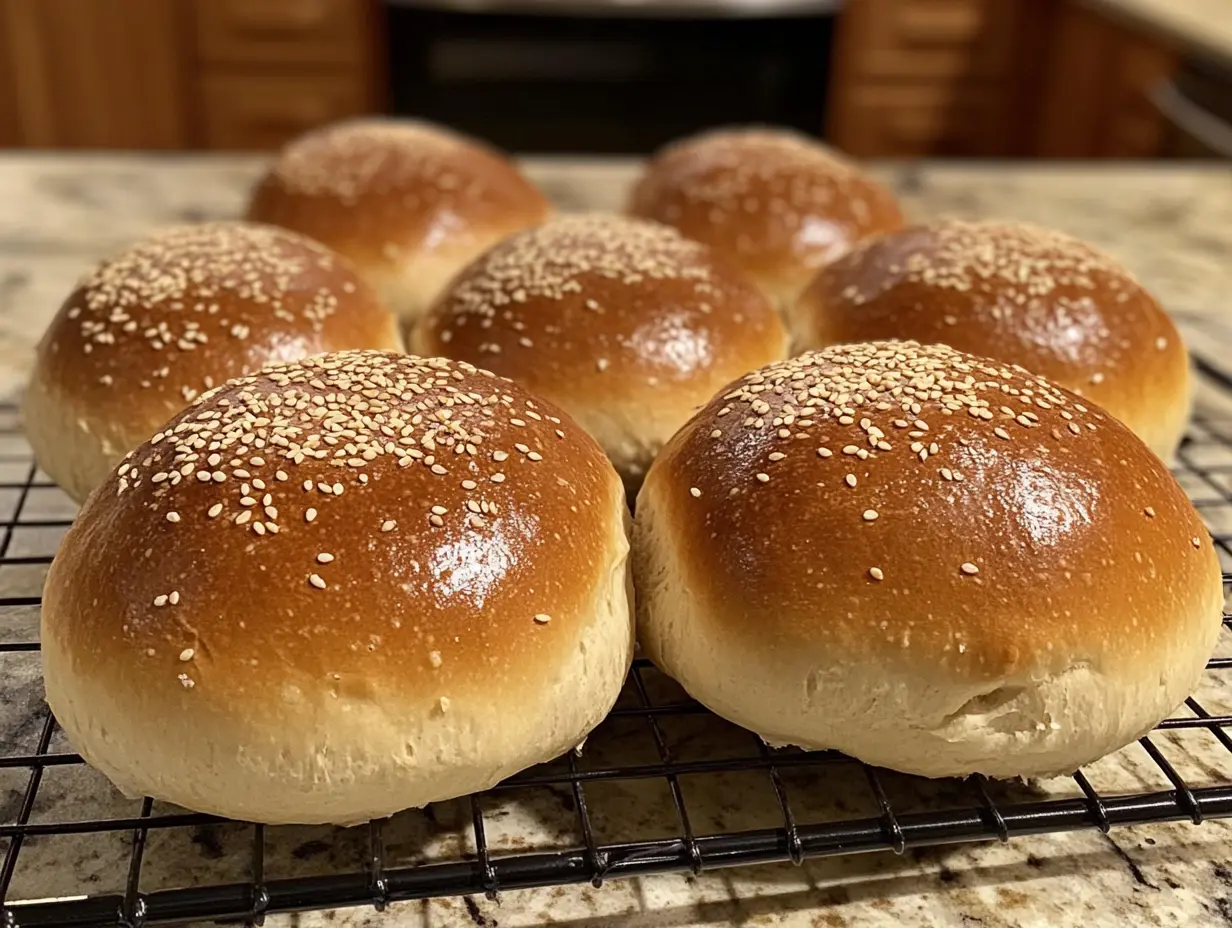
Few things compare to the cozy, comforting scent of freshly baked bread filling your kitchen. My sourdough buns recipe has become a weekend tradition in our little yellow farmhouse here in Asheville. I remember the first time I pulled a batch of these perfectly golden sourdough buns from the oven – Lila’s eyes widened with wonder, and even my husband Eric (who usually reserves his enthusiasm for grilling) couldn’t help but snatch one while it was still steaming.
If you’ve been intimidated by sourdough baking or just want to elevate your burger game beyond those store-bought buns, you’re in the right place. This sourdough buns recipe transforms a simple sandwich into something extraordinary, with that distinctive tang and chewy-yet-tender texture that only properly fermented sourdough can deliver.
Why You’ll Love This Sourdough Buns Recipe
There’s a reason this sourdough buns recipe has become a staple in our household:
- That signature sourdough flavor adds complexity to every bite
- The texture is pillowy soft inside with a delicate crust outside
- They’re surprisingly forgiving for beginners (I promise!)
- These buns freeze beautifully for future meals
- You’ll feel like a kitchen magician when you pull these beauties out of the oven
- They’re incredibly versatile – perfect for burgers, sandwiches, or just slathered with butter
- You’re using your sourdough starter instead of letting it go to waste
Plus, there’s something deeply satisfying about serving homemade buns at your next cookout. When someone asks, “Where did you get these amazing buns?” you get to casually say, “Oh, I made those.” Trust me, it never gets old!
Ingredients
For these perfect sourdough hamburger buns, you’ll need:
- 1 cup (240g) active sourdough starter (100% hydration)
- 3/4 cup (170g) warm milk (around 90°F)
- 2 tablespoons (28g) unsalted butter, melted
- 1 large egg, room temperature
- 2 tablespoons (25g) granulated sugar
- 1 1/2 teaspoons sea salt
- 3 to 3 1/2 cups (360-420g) bread flour
- 1 tablespoon vital wheat gluten (optional, but helps with fluffiness)
For topping:
- 1 egg, beaten with 1 tablespoon of water for a glossy egg wash
- Sesame seeds or everything bagel seasoning (optional)
Ingredient Notes:
- If your starter isn’t quite active enough (it should at least double within 4-6 hours after feeding), your buns might not rise properly.
- No bread flour? All-purpose will work in a pinch, but your buns won’t be quite as fluffy.
- The vital wheat gluten is my secret ingredient for extra-fluffy buns – totally worth finding if you can!
Timing
- Prep time: 30 minutes (active)
- Rising time: 4-6 hours total (bulk rise + shaping + final rise)
- Bake time: 18-20 minutes
- Total time: About 6-7 hours (mostly hands-off)
While this sourdough bun recipe does take time, most of it is hands-off fermentation – the magic happens while you’re doing other things! If you start in the morning, you’ll have fresh buns for dinner.
Step-by-Step Instructions
Step 1: Mix Your Dough
In a large bowl, combine your active sourdough starter, warm milk, melted butter, egg, and sugar. Whisk until well blended – the mixture should look slightly frothy. Gradually add 3 cups of bread flour and the salt, mixing until a shaggy dough forms.
Turn the dough onto a lightly floured surface and knead for about 8-10 minutes, adding the remaining flour only as needed. The dough should be slightly tacky to the touch, but not overly sticky. You’re looking for that smooth, elastic quality that springs back when you poke it gently.
Olivia’s Tip: I like to do the “windowpane test” here – take a small piece of dough and gently stretch it between your fingers. If it stretches thin enough to see light through without tearing, your gluten is well-developed!
Step 2: First Rise (Bulk Fermentation)
Place the dough in a lightly oiled bowl, cover with plastic wrap or a damp kitchen towel, and let rise in a warm spot (about 75°F) for 3-4 hours. Your dough won’t double like a conventional yeasted dough – it might increase by about 50%, and that’s perfect.
Troubleshooting Tip: If your kitchen is cold, try putting the dough in your oven with just the light on. That creates the perfect cozy environment for sourdough to do its thing!
Step 3: Shape Your Buns
Once your dough has risen, gently turn it out onto a lightly floured surface. Press out the air bubbles, then divide the dough into 8 equal portions (about 100-110g each for standard burger buns, or 12 portions for slider-sized buns).
To shape each bun, fold the edges toward the center, flip it over, and use your hands to cup around the dough while gently rotating and pulling downward. This creates surface tension that leads to perfectly round buns. The motion might feel awkward at first, but you’ll get the hang of it!
Step 4: Final Rise
Place the shaped buns on a parchment-lined baking sheet, about 2-3 inches apart. Cover loosely with a clean kitchen towel and let rise for 1-2 hours at room temperature. They should look noticeably puffy but may not fully double in size.
This is when I usually start preheating the oven to 375°F (190°C) during the last 30 minutes of rising.
Step 5: Prepare for Baking
Gently brush the tops of your buns with egg wash, which gives them that beautiful golden shine. Top with sesame seeds or everything bagel seasoning for extra texture and flavor, if you like.
Olivia’s Confession: I used to skip the egg wash step, thinking it was unnecessary… until my husband pointed out that my buns never looked quite like the ones in bakeries. The egg wash makes such a difference!
Step 6: Bake to Perfection
Bake the sourdough burger buns in the preheated oven for 18-20 minutes, or until the tops are golden brown and the internal temperature reaches about 190°F (88°C).
Once baked, move to a wire rack and let cool completely before slicing. I know it’s tempting to tear into them right away, but giving them at least 30 minutes to cool allows the texture to set properly.
Cooking Tips for Perfect Sourdough Buns
After many batches (and yes, some flat failures), I’ve learned these game-changing tips for the perfect sourdough burger buns recipe:
- Pro Tip: Use room temperature ingredients to help your dough rise properly.
- Don’t rush the fermentation: The longer, slower rise is what develops that amazing sourdough flavor.
- Be gentle with the dough: After the first rise, handle the dough delicately to preserve the air bubbles that give your buns their fluffy texture.
- Create tension when shaping: The tighter you can make the surface of each bun during shaping, the higher they’ll rise.
- Steam helps: Place a shallow pan of hot water on the bottom rack of your oven during baking to create steam, which helps the buns rise even more before the crust sets.
The most common mistake I see in sourdough baking is not having patience. Trust the process—your dough will rise, even if it’s taking longer than you expected!
A Kitchen Memory Worth Sharing
Last summer, we hosted a backyard barbecue with these homemade sourdough buns as the star of the show. I had spent the morning tending to my dough while Caleb “helped” by repeatedly asking, “Are they ready yet?” every five minutes.
When our guests arrived, my friend Sarah (who considers herself a bread connoisseur) took one bite of her burger and stopped mid-conversation. “Olivia, did you MAKE these buns?” The look of shock and delight on her face made all those hours of waiting for dough to rise completely worth it.
That’s what I love about this sourdough bun recipe – it might take a bit more time than running to the store, but the impression it makes (and the satisfaction you feel) is immeasurable.
Nutritional Information
Per bun (when making 8):
- Calories: 230
- Protein: 7g
- Carbohydrates: 38g
- Fiber: 2g
- Fat: 5g
- Sodium: 440mg
These sourdough hamburger buns offer some nutritional advantages over store-bought versions. The fermentation process makes nutrients more bioavailable and can make the bread easier to digest for some people. According to research on sourdough fermentation, the lactic acid bacteria can help break down phytic acid in grains, potentially making minerals like calcium, magnesium, and iron more accessible to your body.
Healthier Alternatives
My sourdough bun recipe is pretty flexible if you want to make some healthy substitutions:
- Whole Wheat Option: Swap in up to 50% whole wheat flour for a fiber boost—just add an extra tablespoon of liquid if the dough feels dry
- Less Sugar: Reduce sugar to 1 tablespoon with little impact on texture—it’s still soft and flavorful
- Dairy-free option: Unsweetened almond milk or oat milk works beautifully in place of dairy milk.
- Egg-free version: Replace the egg in the dough with 3 tablespoons of applesauce or a flax egg (1 tablespoon ground flaxseed mixed with 3 tablespoons water, left to gel for 5 minutes).
Remember, any time you make substitutions, you might need to adjust hydration levels slightly as different flours absorb water differently.
Serving Suggestions
These sourdough buns elevate any sandwich or burger experience. Here’s how I love to enjoy these buns—from sliders to breakfast sandwiches:
- Classic burgers: Nothing beats a juicy beef, turkey, or vegetable patty on these buns. The tanginess of the sourdough complements the umami flavors beautifully.
- Pulled pork or chicken: The sturdy texture holds up well to saucy fillings without getting soggy.
- Breakfast sandwiches: Split and toast a bun, then layer with eggs, cheese, and avocado for a special morning treat.
- Garlic bread: Slice horizontally, butter, sprinkle with garlic powder and herbs, then toast until golden.
For the ultimate burger night, pair these buns with my 7-layer taco salad recipe on the side for a feast your family won’t forget!
Common Mistakes to Avoid
Even as someone who makes this sourdough bun recipe regularly, I’ve had my share of less-than-perfect batches. Here are the pitfalls to watch for:
- Using an inactive starter: Your starter should be bubbly and at its peak when you use it. If your yeast is sluggish, your buns may not rise—make sure it’s fresh and active.
- Not kneading enough: Underdeveloped gluten leads to dense buns. That’s why the windowpane test is so helpful!
- Over-flouring the dough: A slightly tacky dough will give you lighter, fluffier buns than a stiff, dry dough.
- Rushing the rise: Sourdough works on its own timeline—sometimes it’s faster, sometimes slower, depending on temperature and humidity. Watch the dough, not the clock.
- Cutting into them too soon: I know it’s hard to wait, but slicing warm buns can make them gummy inside.
Storing & Reheating Tips
These sourdough hamburger buns stay fresh at room temperature in an airtight container or bag for about 2-3 days. For longer storage, I recommend freezing them:
- Allow the buns to cool completely
- Wrap each bun in plastic wrap, then store together in a freezer bag to keep them fresh
- Freeze for up to 3 months
- Thaw at room temperature or defrost in the microwave on low power
To refresh day-old buns, sprinkle them with a few drops of water and warm in a 300°F oven for about 5 minutes. This revives that fresh-baked texture beautifully!
If they’re getting a bit stale, don’t throw them out! Cube them up for the best homemade croutons or bread pudding you’ve ever tasted.
FAQs
Can I make this sourdough bun recipe without a mature starter?
You need an established sourdough starter for this recipe, but if you don’t have one yet, you can either get some from a friend who bakes, purchase one online, or make your own (though that takes about a week). There’s no shortcut around this for a true sourdough burger buns recipe – the starter is what gives them their distinctive flavor and texture.
How can I make my sourdough buns softer?
For extra-soft sourdough buns, add a tablespoon of butter or oil to the dough, and brush the tops with melted butter as soon as they come out of the oven. Also, adding a bit more milk (about 2 tablespoons) to the dough can help create a more tender crumb.
Can I make these buns ahead of time for a party?
Absolutely! The best approach for make-ahead sourdough hamburger buns is to bake them 1-2 days before, or even weeks ahead and freeze them. Reheat frozen buns in a warm oven wrapped in foil, and they’ll taste nearly fresh-baked.
Final Thoughts
Mastering this sourdough buns recipe might take a try or two, but I promise the journey is worth it. There’s something deeply satisfying about working with sourdough – it connects us to generations of bakers before us who crafted bread with nothing more than flour, water, salt, and time.
Every time I make these sourdough burger buns, I’m reminded that good things can’t be rushed. In our world of instant everything, sourdough teaches patience and rewards it generously with flavor and texture that simply can’t be manufactured.
So pull out your starter, clear your schedule for a lazy day of intermittent baking, and prepare to amaze your family with these artisan-quality buns. The first bite – that perfect combination of tender crumb and subtle tang – will have everyone wondering why they ever settled for store-bought.
Try my sourdough buns recipe this weekend and let me know how they turn out for you!
Print
Sourdough Buns Recipe: 5 Tips for Perfectly Fluffy Buns
- Total Time: 50 minutes
- Yield: 8 burger buns 1x
- Diet: Vegetarian
Description
Want perfectly fluffy buns? Master your sourdough buns recipe with our 5 essential tips. Elevate your baking game today! Discover more.
Ingredients
For these perfect sourdough hamburger buns, you’ll need:
-
- 1 cup (240g) active sourdough starter (100% hydration)
-
- 3/4 cup (170g) warm milk (around 90°F)
-
- 2 tablespoons (28g) unsalted butter, melted
-
- 1 large egg, room temperature
-
- 2 tablespoons (25g) granulated sugar
-
- 1 1/2 teaspoons sea salt
-
- 3 to 3 1/2 cups (360-420g) bread flour
-
- 1 tablespoon vital wheat gluten (optional, but helps with fluffiness)
For topping:
-
- 1 egg, beaten with 1 tablespoon of water for a glossy egg wash
-
- Sesame seeds or everything bagel seasoning (optional)
Ingredient Notes:
-
- If your starter isn’t quite active enough (it should at least double within 4-6 hours after feeding), your buns might not rise properly.
-
- No bread flour? All-purpose will work in a pinch, but your buns won’t be quite as fluffy.
-
- The vital wheat gluten is my secret ingredient for extra-fluffy buns – totally worth finding if you can!
Instructions
In a large bowl, combine your active sourdough starter, warm milk, melted butter, egg, and sugar. Whisk until well blended – the mixture should look slightly frothy. Gradually add 3 cups of bread flour and the salt, mixing until a shaggy dough forms.
Turn the dough onto a lightly floured surface and knead for about 8-10 minutes, adding the remaining flour only as needed. The dough should be slightly tacky to the touch, but not overly sticky. You’re looking for that smooth, elastic quality that springs back when you poke it gently.
Olivia’s Tip: I like to do the “windowpane test” here – take a small piece of dough and gently stretch it between your fingers. If it stretches thin enough to see light through without tearing, your gluten is well-developed!
Place the dough in a lightly oiled bowl, cover with plastic wrap or a damp kitchen towel, and let rise in a warm spot (about 75°F) for 3-4 hours. Your dough won’t double like a conventional yeasted dough – it might increase by about 50%, and that’s perfect.
Troubleshooting Tip: If your kitchen is cold, try putting the dough in your oven with just the light on. That creates the perfect cozy environment for sourdough to do its thing!
Once your dough has risen, gently turn it out onto a lightly floured surface. Press out the air bubbles, then divide the dough into 8 equal portions (about 100-110g each for standard burger buns, or 12 portions for slider-sized buns).
To shape each bun, fold the edges toward the center, flip it over, and use your hands to cup around the dough while gently rotating and pulling downward. This creates surface tension that leads to perfectly round buns. The motion might feel awkward at first, but you’ll get the hang of it!
Place the shaped buns on a parchment-lined baking sheet, about 2-3 inches apart. Cover loosely with a clean kitchen towel and let rise for 1-2 hours at room temperature. They should look noticeably puffy but may not fully double in size.
This is when I usually start preheating the oven to 375°F (190°C) during the last 30 minutes of rising.
Gently brush the tops of your buns with egg wash, which gives them that beautiful golden shine. Top with sesame seeds or everything bagel seasoning for extra texture and flavor, if you like.
Olivia’s Confession: I used to skip the egg wash step, thinking it was unnecessary… until my husband pointed out that my buns never looked quite like the ones in bakeries. The egg wash makes such a difference!
Bake the sourdough burger buns in the preheated oven for 18-20 minutes, or until the tops are golden brown and the internal temperature reaches about 190°F (88°C).
Once baked, move to a wire rack and let cool completely before slicing. I know it’s tempting to tear into them right away, but giving them at least 30 minutes to cool allows the texture to set properly.
- Prep Time: 30 minutes
- Cook Time: 20 minutes
- Category: Bread
- Method: Baking
- Cuisine: American
Nutrition
- Serving Size: 1 bun
- Calories: 230
Keywords: sourdough buns recipe, sourdough hamburger buns recipe, homemade burger buns, sourdough burger buns, sourdough bread, artisan burger buns, fluffy sourdough buns, sourdough baking, homemade bread recipe